Self-Validation Using Touchstone
Touchstone enables seamless debugging and self-validation of Conviva's video sensor integration with the streaming applications/platforms. It tracks user actions within the integrated devices and subsequently transmits session summaries, metrics, and metadata for debugging purposes.
Touchstone eliminates the discrepancy in metric values between Pulse and Touchstone. The older version of Touchstone is a standalone tool. Touchstone is available in Pulse, so you don't need to switch the working environments to perform self-validation of any video sensor integration.
Touchstone in Pulse

Once you complete the integration steps, perform a self-validation and debug the video sensor integration using Touchstone.
Note: For details about sensor integration, see Conviva Video Sensor Integration.
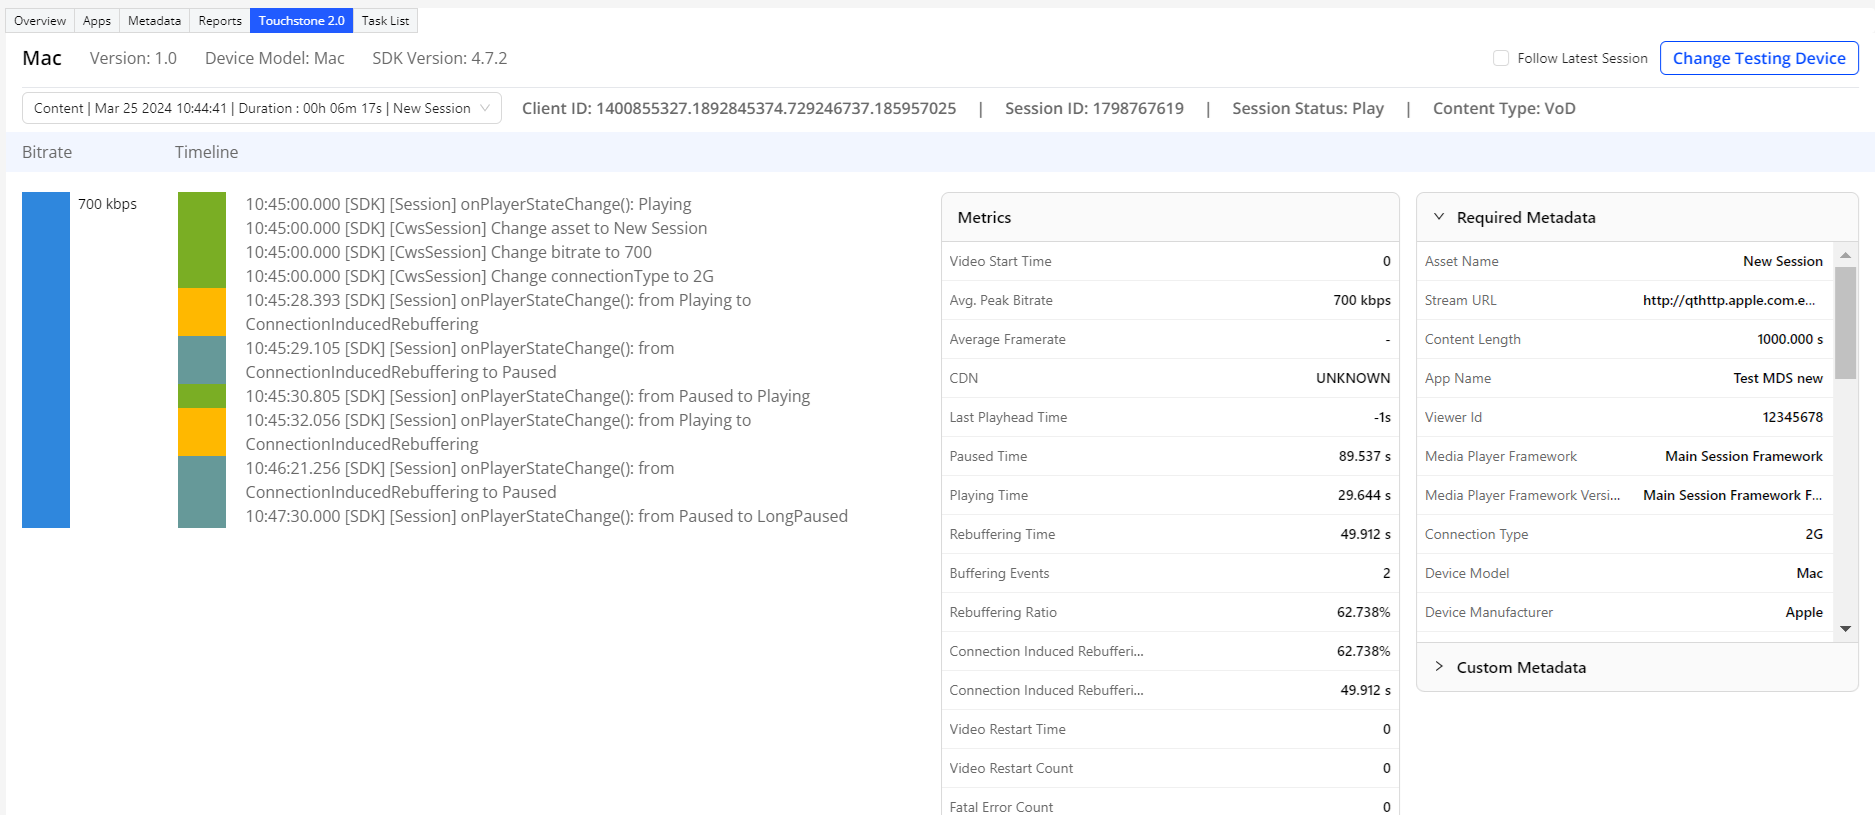
Touchstone monitors the activities of your integrated video application/player. You can see the list of devices, session status, and drill-down further to see the summary of session timeline, metrics, and custom metadata, and so on.
Perform Self-Validation
Perform the following steps for Self-Validation:
-
From any of the Conviva sensor, generate the session traffic to:
https://<customer_key>.ts-testonly.conviva.com. -
Start testing the Stream Sensor Sanity Test Cases.
Download the sanity and full test plans in the Conviva Video SDK Integration Sanity Test Plan and Conviva Video SDK Integration Full Test Plan spreadsheets.
-
Login to Pulse.
-
Select the account where traffic is being sent.

-
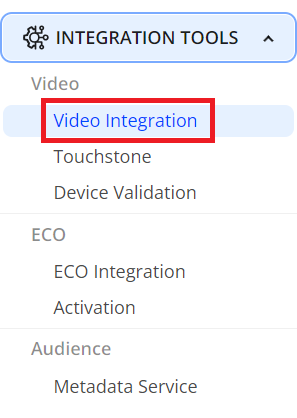
Click the hamburger icon next to the Conviva logo and select Integration > Touchstone from the menu.

-
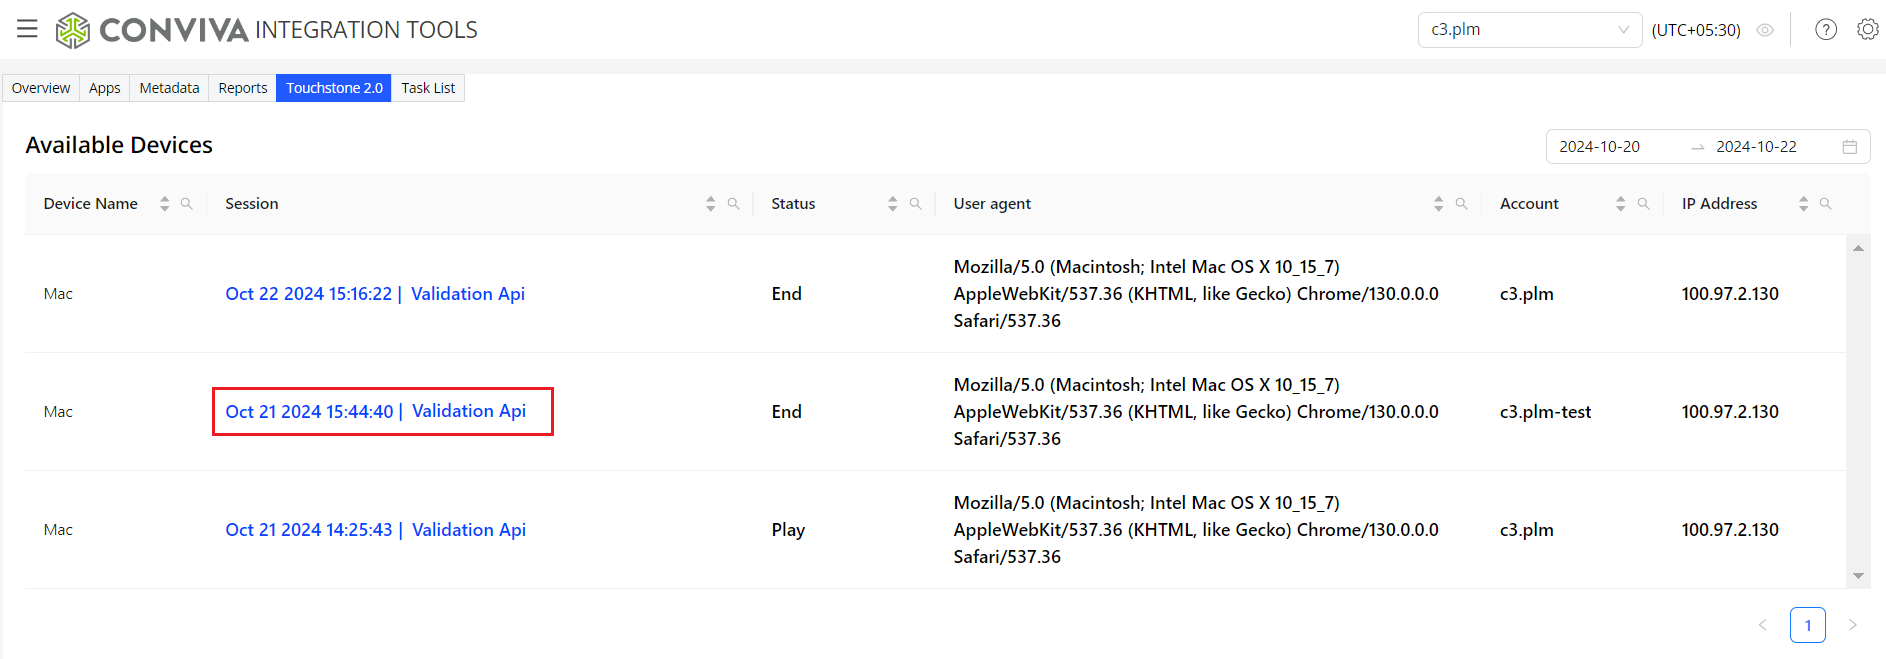
In the Touchstone tab, see the list of device-wise sessions for the selected account.
-
Click the session link to monitor session details which include timeline and session summary (metrics and metadata).

-
See the timeline details with the summary of metrics and metadata for the selected session.

In addition to monitoring the the timeline details, you can perform the following actions on this page:
-
Select the Follow Latest Session check box to see the latest session details.

-
Select the Auto Scroll check box to automatically scroll down along the timeline to see the last recorded events.

-
Export session summary in the PDF format by clicking the Export to PDF icon at the top-right corner.

-
Export session summary in the Excel format by clicking the Export to Excel icon at the top-right corner.

-
Share the link of currently-opened session summary dashboard with other users:
-
Click the share icon at the top-right corner.

-
Click Copy to Clipboard in the Share Dashboard pop-up window, and share the copied link with others.

-
Other Links