Efficient filter monitoring requires keeping only necessary filters and removing unnecessary ones. This approach maintains a concise filter list, allowing Pulse users to locate and use relevant filters quickly.
Note: Easily manage large numbers of filters using the bulk_filters API. For more details, see Bulk Filters API at https://developer.conviva.com.
To see the filter management,
-
Click on the Settings icon and select Filter Management.
The Filter Management screen categorically displays all filters, with options to reorder the filters by clicking any column heading.
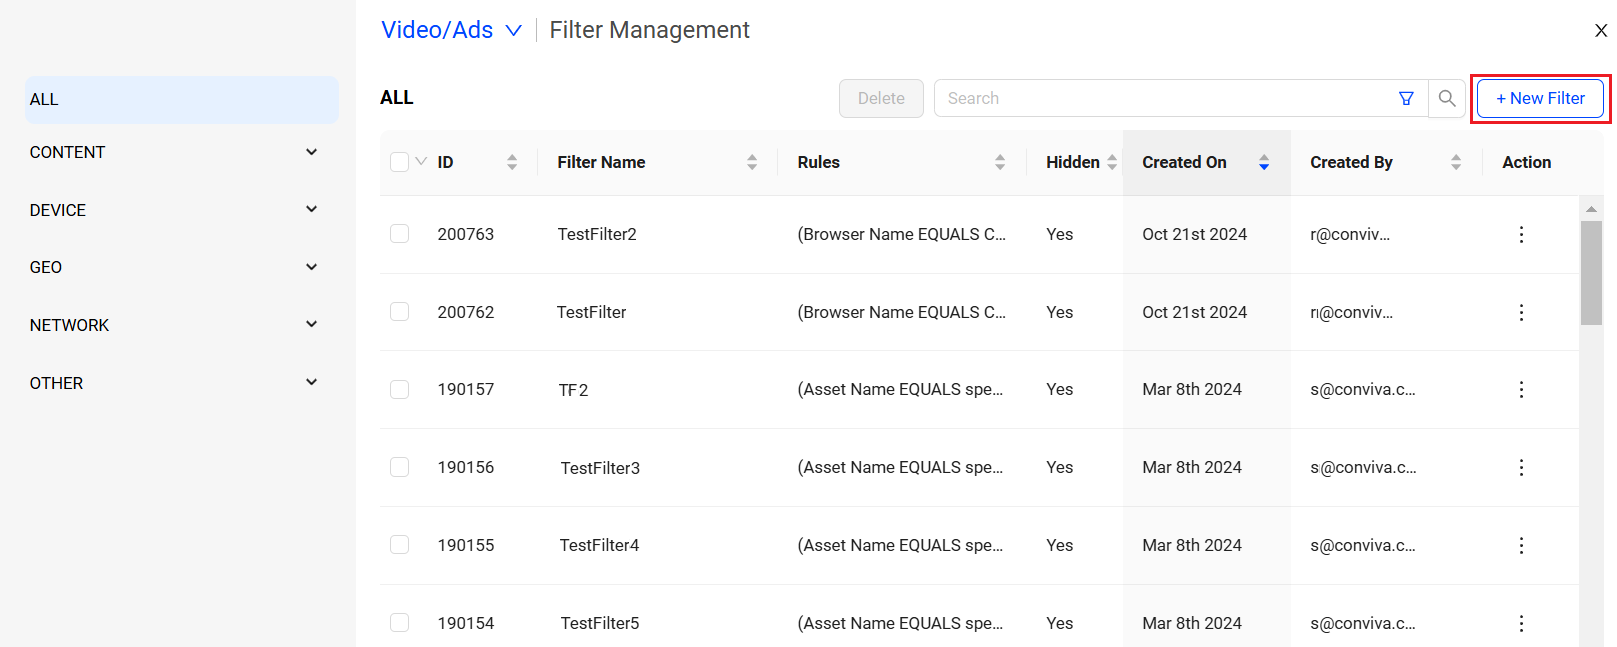
For example:
Sort by Created On to see filters based on the day it was created.
The example below shows filters sorted by the filter creation date.
Image: Filter Management
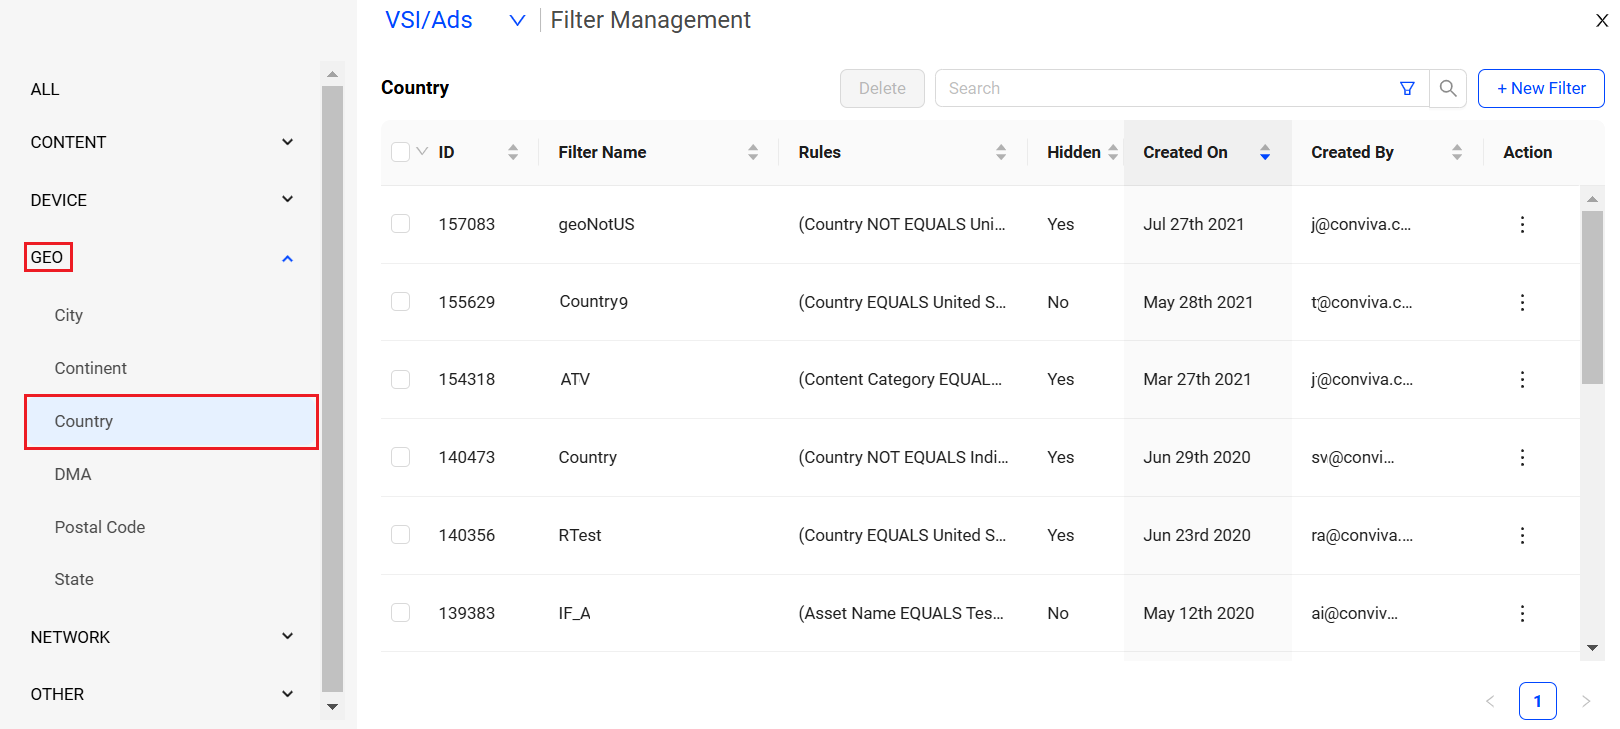
The left category menu lists different categories and enables sorting filters by category.
-
Select any filter on the left panel to sort the filter data.
In this example, the data is sorted based on the Country.
Image: Filter Management with Country
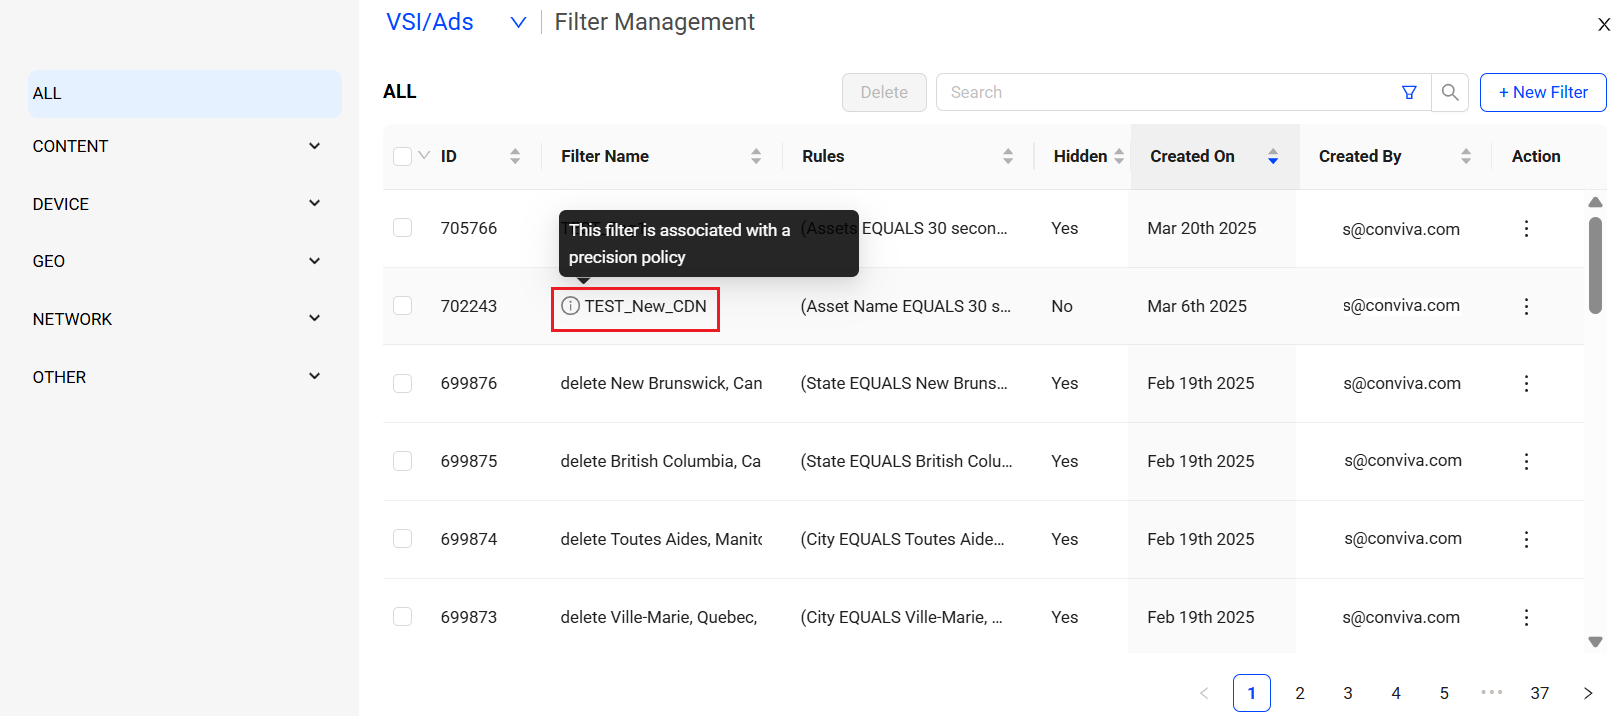
Filters associated with Precision Policies
The filter management list includes filters associated with the precision policy. Updating the Precision Policy filter can impact the Precision traffic. Ensure to review the policies before making any changes.
Image: Filter Management with Precision Policies
-
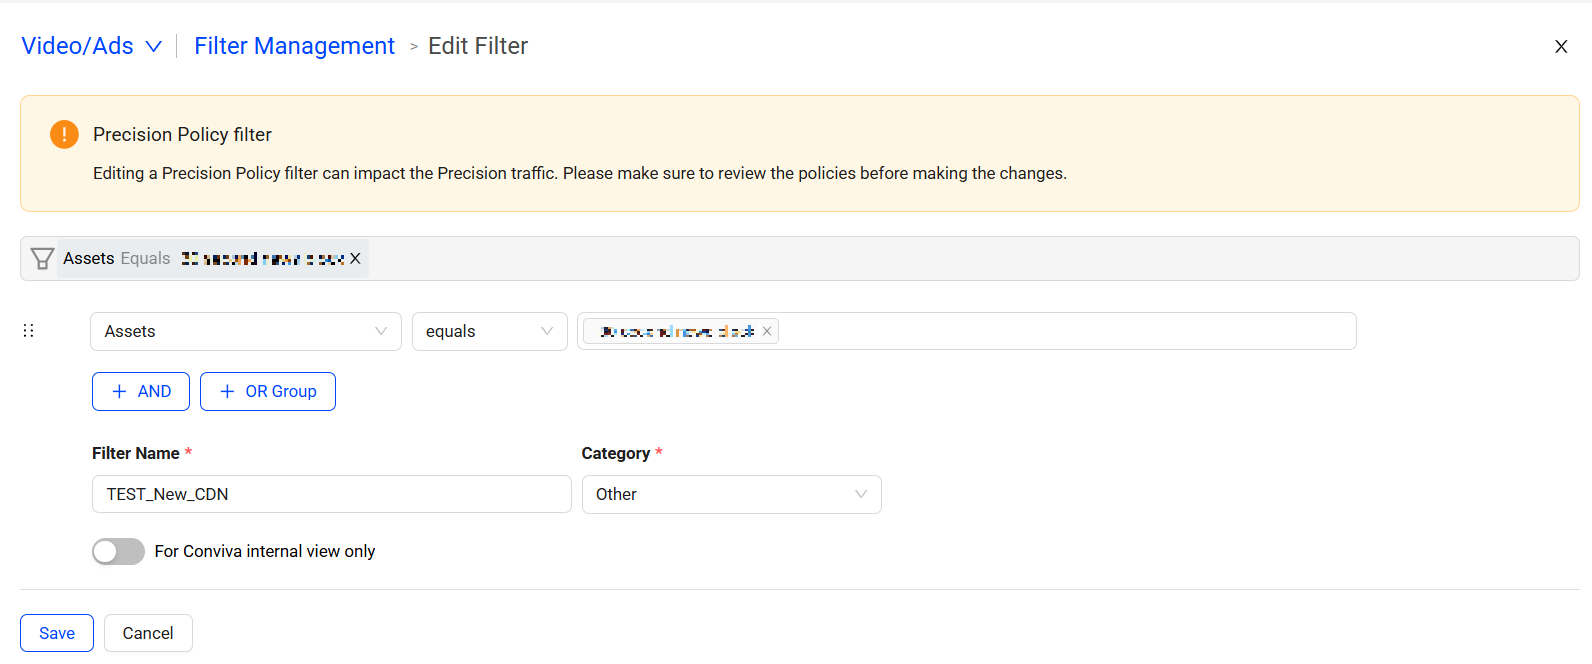
Select the filter associated with the precision policy. In this example, Test_New_CDN is used to see the Edit Filter page.
Image: Edit Filter
-
On the Edit Filter page, update the details as required and click Save.
Note: Precision filters support only the Equals and Not Equals operators. To create filters with other operators, contact Conviva Customer Support.
Creating Dimensions
Dimension Management enables the conversion of custom tags into custom dimensions for use in VSI and Ad Experience. Users can select the required tags for conversion, adhering to a tag conversion limit specified in their company's contract. For information on converting custom tags to dimensions, see Dimension Management.
Creating Filters
To create a filter from the Filter Management screen,
Click New Filter button, to see the Create Filter page.
Image: Create Filter
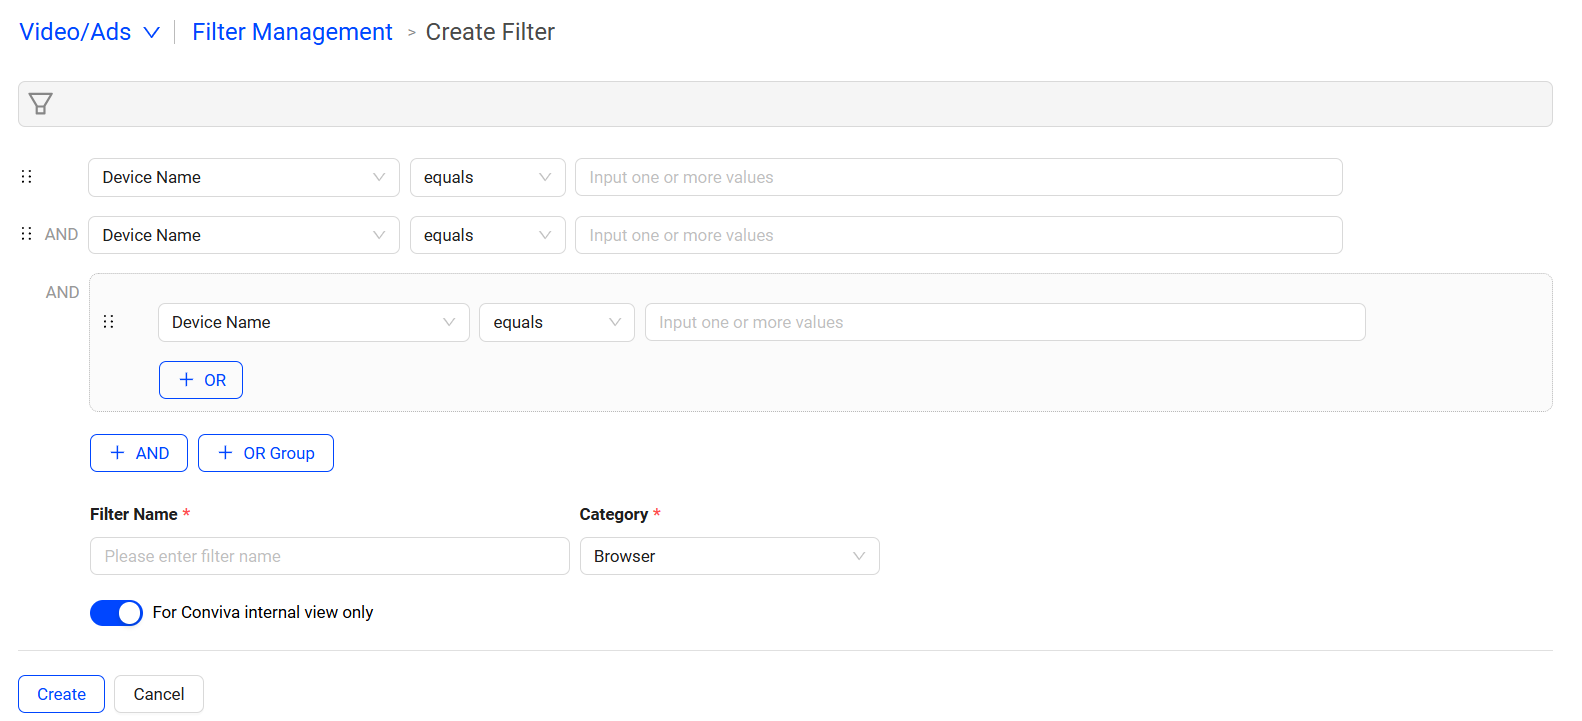
For more information on filter creation, see Creating and Cloning Filters.
Editing Filters
Understand the potential impact of any changes before editing a filter.
Changing the name or category of a filter does not affect the data already collected. However, any other changes impact how future data is collected.
For example, removing the flag for Top Rising Content removes the ability to use those filters on that dashboard.
To edit a filter:
-
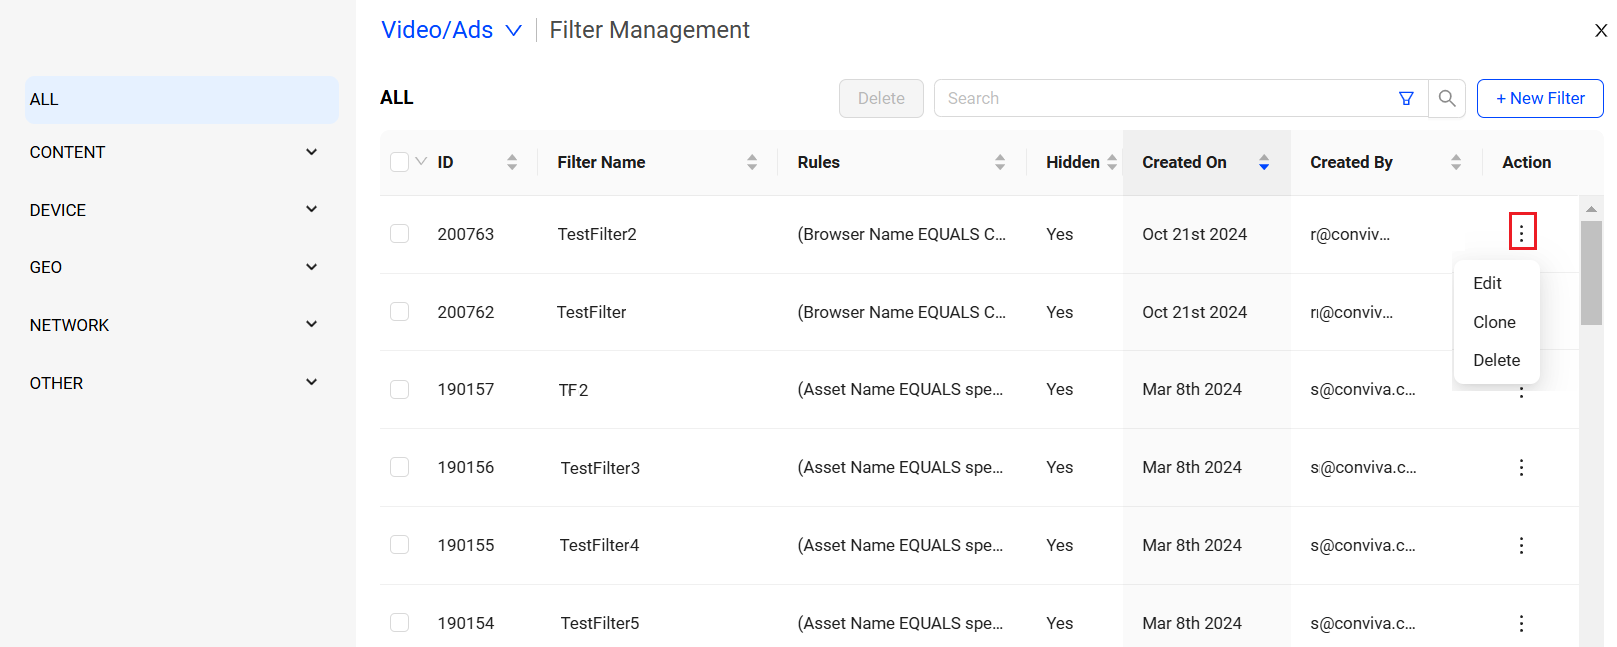
In the filter Management screen, click the Kebab icon next to the desired filter and select Edit from the drop-down.
Image: Filter Management
-
Edit the filter as required and click Save.
Image: Edit Filter
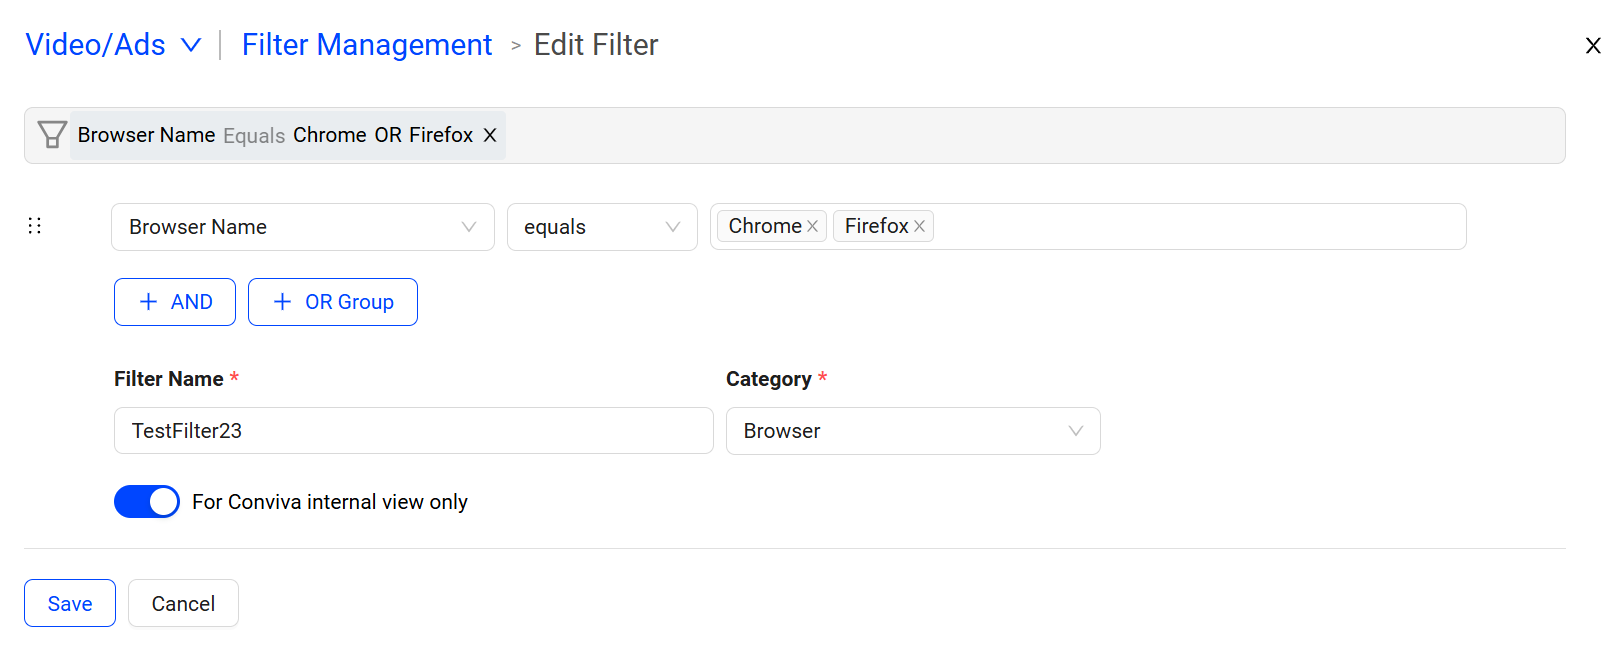
Edit Filter page automatically populates the values from the filter selected.
Searching for Filters
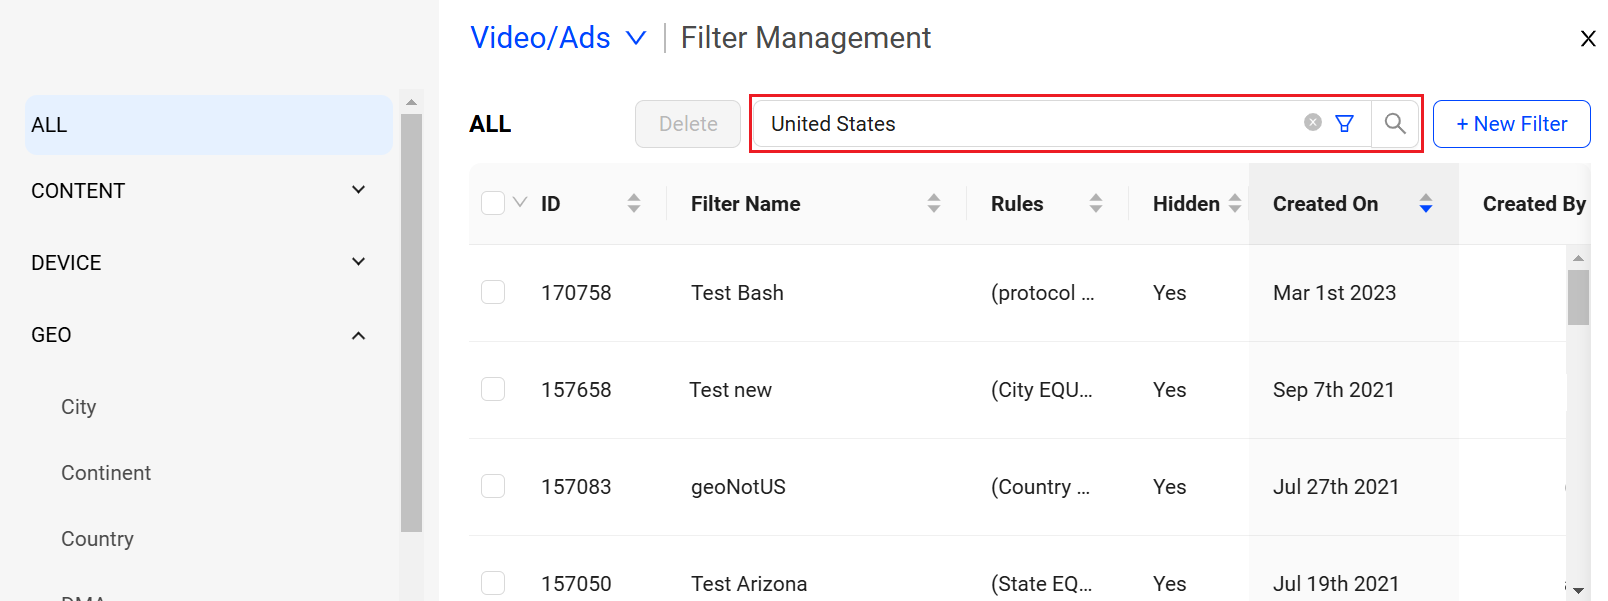
Search for a filter by Name, Creation Date, Created On, or Created Byfields.
-
Type a search term in the search box and press Enter. In this example, we search for the term "New Zealand":
Image: Search in Filter Management
Cloning Filters
Clone a filter, and save the filter in a different name.
-
In the filter Management screen, click the kebab icon next to the desired filter and select Clone from the drop-down.
Image: Filter Management
-
Clone Filter screen is displayed. Edit the details as required and click Save. Clone Filter page automatically populates with the values from the filter selected.
Image: Clone Filter

Deleting Filters
Delete filters individually or bulk from the filter management screen to streamline the filter list.
Note: A filter linked to a Conviva object, such as an alert or daily email, cannot be deleted. To remove this type of filter, delete the associated objects first.
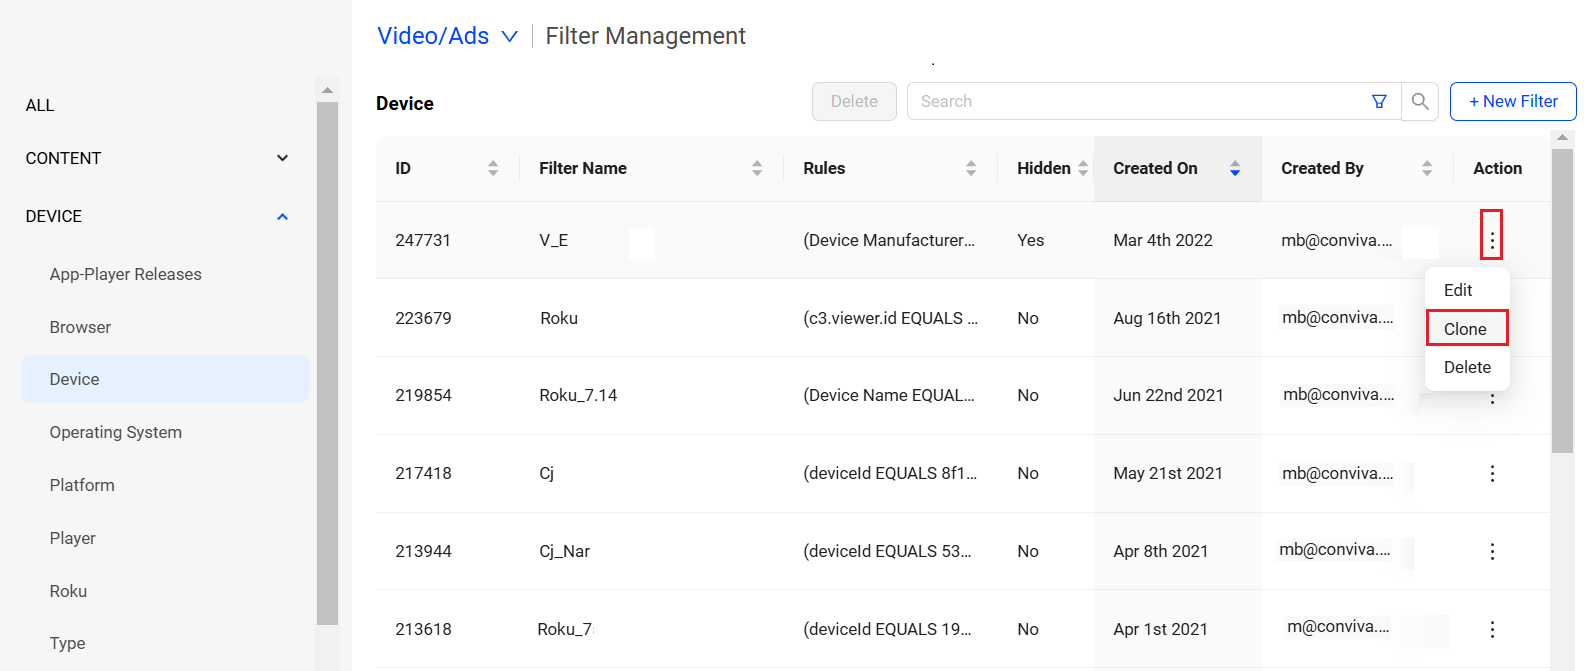
Delete filter induvidualy or as a group of multiple filters,
-
To delete a single filter, click the kebab icon next to the desired filter and select Delete from the drop-down.
Image: Delete Filter
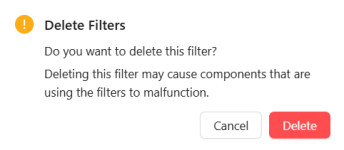
Click Delete to confirm the deletion.
Image: Delete Filter
-
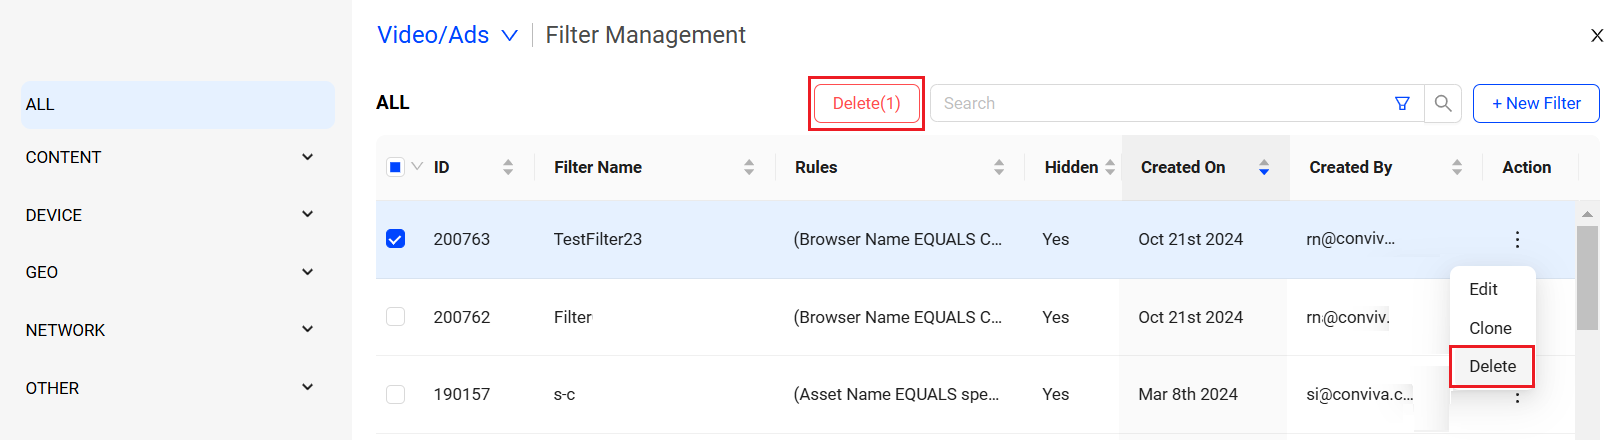
To delete multiple filters, select the checkbox next to the filter IDs of the desired filter and click Delete, to confirmation the filter deletion .
Use the search feature to limit the displayed filters by filter ID, such as "200" for filters with this number in the ID.
Image: Delete Filter
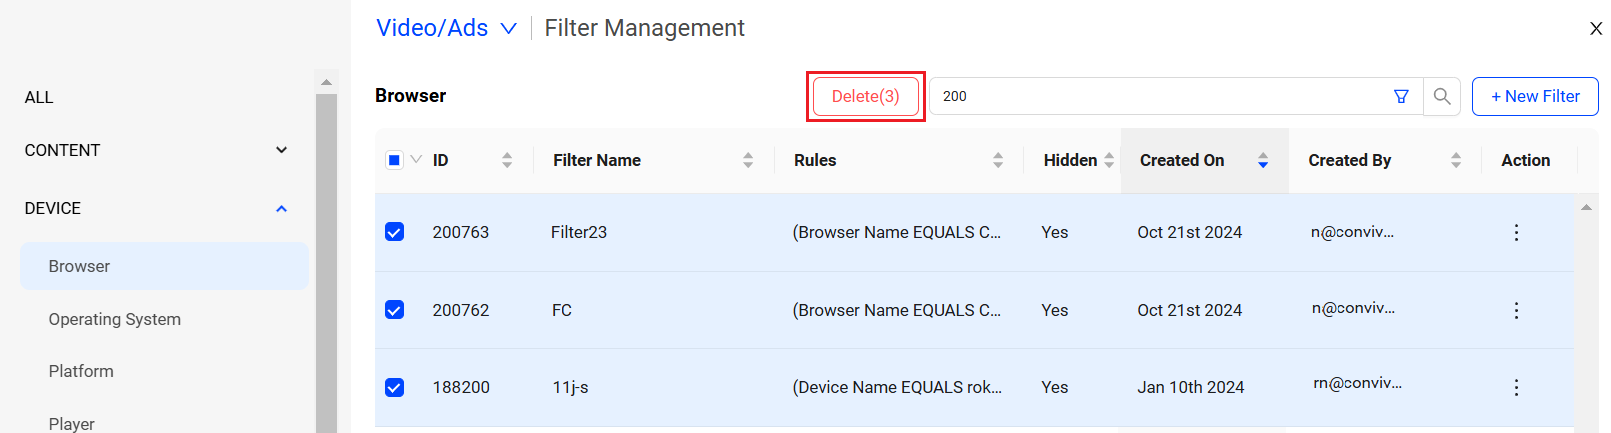
Click Delete to confirm the deletion.
Image: Delete Filter
Managing Filters Deleting Filters Managing Filters Managing Filters