Conviva VSI uses filters to display subsets of your company's data based on the fields and values you select. These fields and values are pre-defined based on your company's data or custom tags you have created.
Before you work with filters, consider all the ways you want to drill down into your data. Some questions to consider:
-
What type of devices do your viewers use the most to view content?
-
Are the devices connected or mobile?
-
How do iPhones perform vs. iPads?
-
Are viewers watching via WiFi or cellular?
-
-
Is one CDN performing better than another?
-
Are viewing patterns similar for free and paid content?
-
Does an Android or iOS player take longer to startup?
Creating a Filter
-
Click Settings Icon >> Filters Management in any dashboard page.
-
Click Create New Filter.
-
Enter a name for the new filter.
-
Define the rule for the new filter.
-
Select field (pre-defined or custom dimension).
-
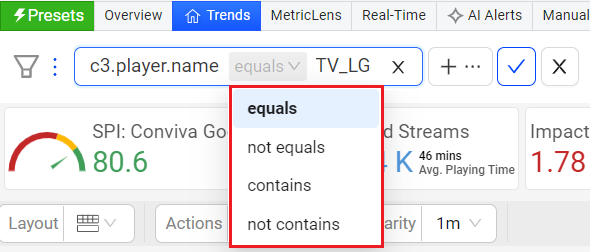
Choose a comparison (for example, "equals", "not equals", "contains", "not contains).
-
Select a value.
-
-
Choose a category.
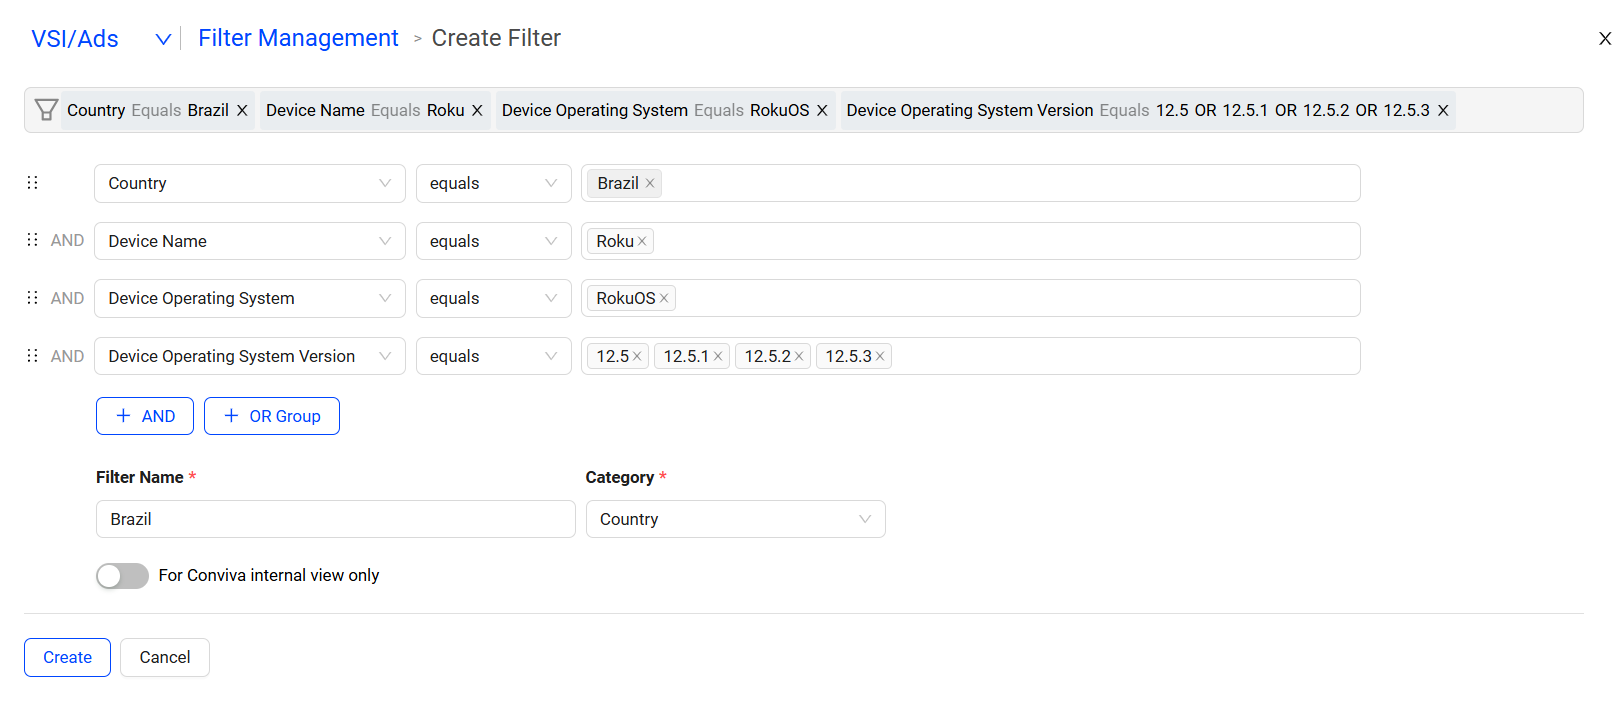
The example below shows how to create a filter for Roku players in Brazil.

-
The filter name is displayed in ConvivaVSI when you use the filter, so Conviva recommends descriptive names that are easy to differentiate yet use limited space efficiently.
-
Rules consist of a field, a comparison (equals, not equals and sometimes contains, not contains depending on the field) and the value.
-
To create a filter with multiple rules, click +AND button and add the details as required. Also, you can add a group filter by clicking +Group button.
Adding a group filter will create a logical OR group and individual filter will create a Logical AND hierarchically.
-
Legacy Diagnostics and Alerts have been deprecated and may not be available in your account. If you do have access to them, Conviva does not recommend using them for new filters.
-
You can use new filters immediately, but they would not have any data at first. Wait at least 5 minutes for the new data points to appear in your dashboards.
Create Filters using Filter Builder
Using the filter builder in Trends enables focus data analysis with inline filter creations and updates.
-
Save inline settings to create a new filter
-
Open filter builder for a quick filter creation

For more information on creating the filters using the filter builder, see Filter_Builder.
Clone an Existing Filter
If you want to create a filter similar to an existing one (filter with the same rules but in a different geography), it's faster and easier to clone and edit than create a new one. You cannot clone the "All Traffic" filter.
-
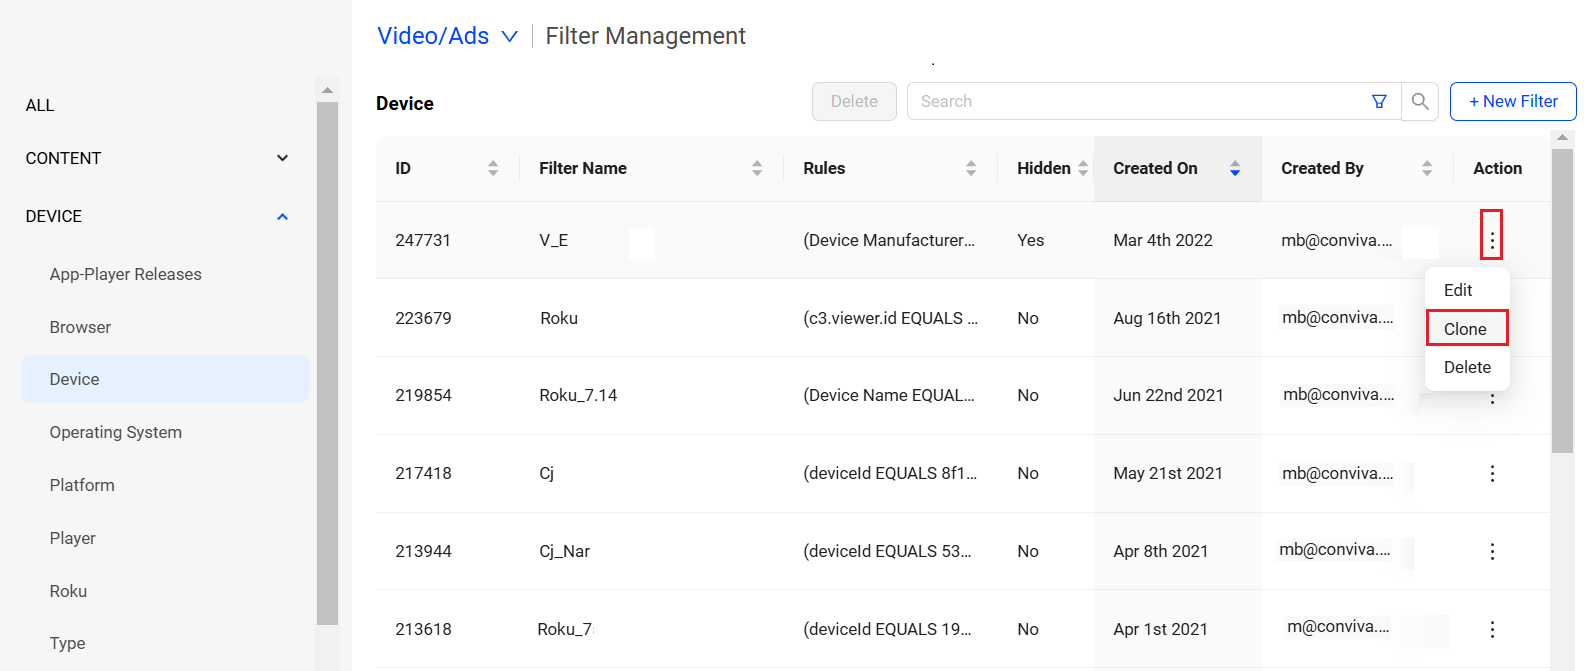
In the filter Management screen, click the kebab icon next to the desired filter and select Clone from the drop-down.

-
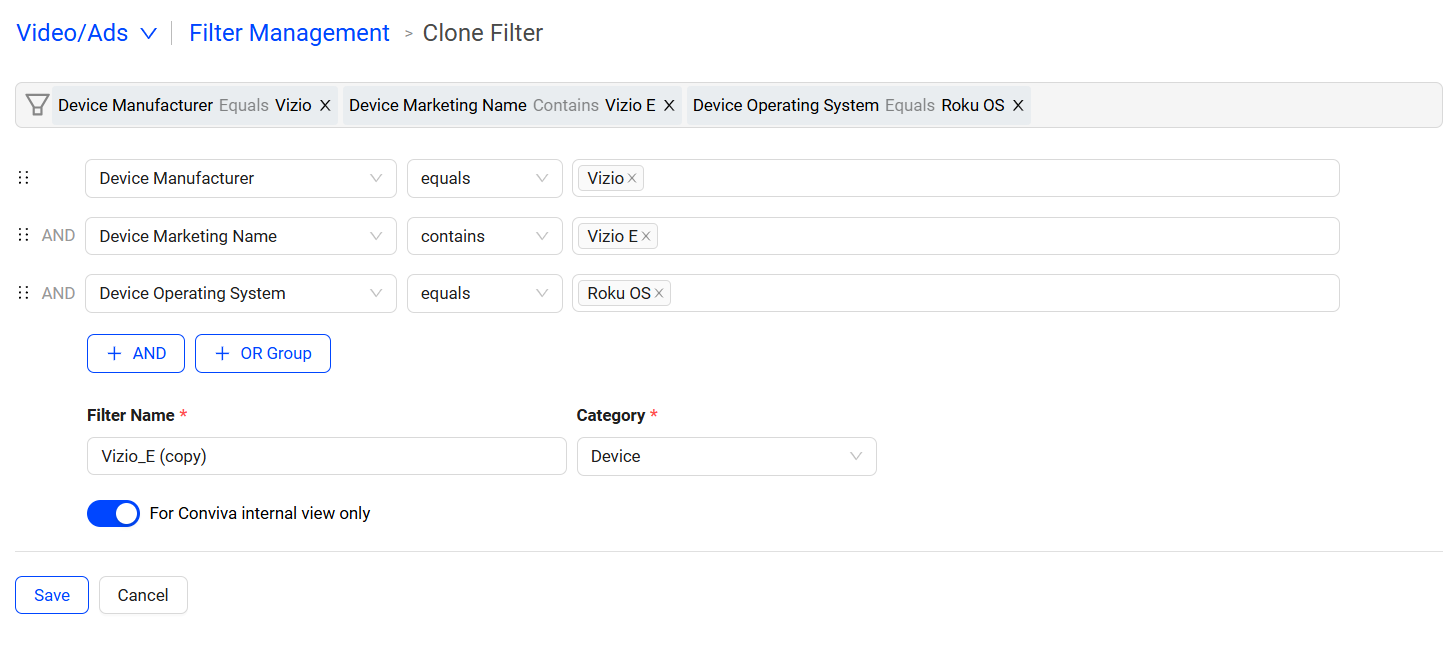
Clone Filter screen is displayed. Edit the details as required and click Save. Clone Filter page automatically populates with the values from the filter you selected.

-
Click Save.
The Filter Management page displays the newly cloned filter.
Organizing Filters
While creating a filter, assign a category and subcategory. Selecting certain fields prompts the system to suggest category and subcategory types for rule(s). Update the category and subcategory of an existing filter as needed. To become more familiar with Conviva VSI, use the categories and subcategories listed below to organize filters. Metadata examples appear below for reference.
|
Category |
Subcategory |
Examples of Metadata |
|---|---|---|
|
Content |
Asset |
Asset Name Live Video |
|
Show |
Genre Show Name Episode ID Season ID |
|
|
Site |
Site Name |
|
|
Tag |
Custom Tag |
|
|
Geo |
Country |
Country |
|
State |
State |
|
|
DMA |
DMA |
|
|
City |
City |
|
|
Postal Code |
Postal Code |
|
|
Network |
Affiliate |
Affiliate |
|
ASN |
ASN |
|
|
CDN |
CDN |
|
|
ISP |
ISP |
|
|
Resource |
Resource |
|
|
Device |
Browser |
Browser Browser Version |
|
Type |
Device Model Device Version Marketing Name Brand Device Type Manufacturer |
|
|
Operating System |
OS OS Version |
|
|
Platform |
Platform Platform Version |
|
|
Player |
Client ID Player Name Flash Version Framework Framework Version |
|
|
Other |
<Customer Specific> |
N/A |