Conviva VSI provides an option to integrate manual and AI alerts with Datadog, enhancing advanced video alerting through Datadog’s escalation management and notification capabilities. A Datadog account with configured services is required to complete the integration.
Note: When integrating metrics with Datadog, set up a filter, dimension, and tags. A filter refers to a pre-configured saved filter in Conviva, and a dimension refers to a configured dimension in Conviva. Tags must align with Datadog tags.
-
Log in to Datadog and from the Integrations menu select APIs.
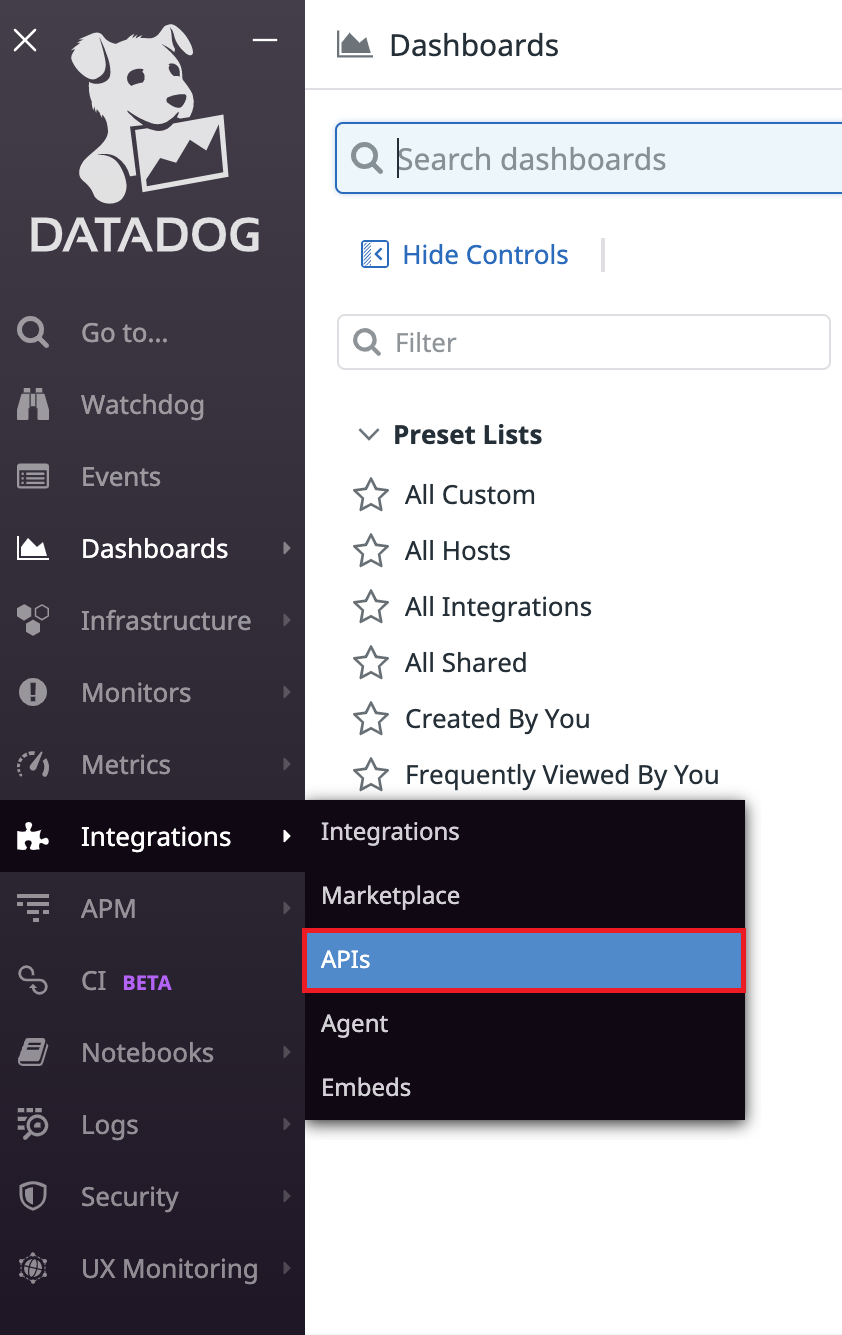
The APIs page appears.
-
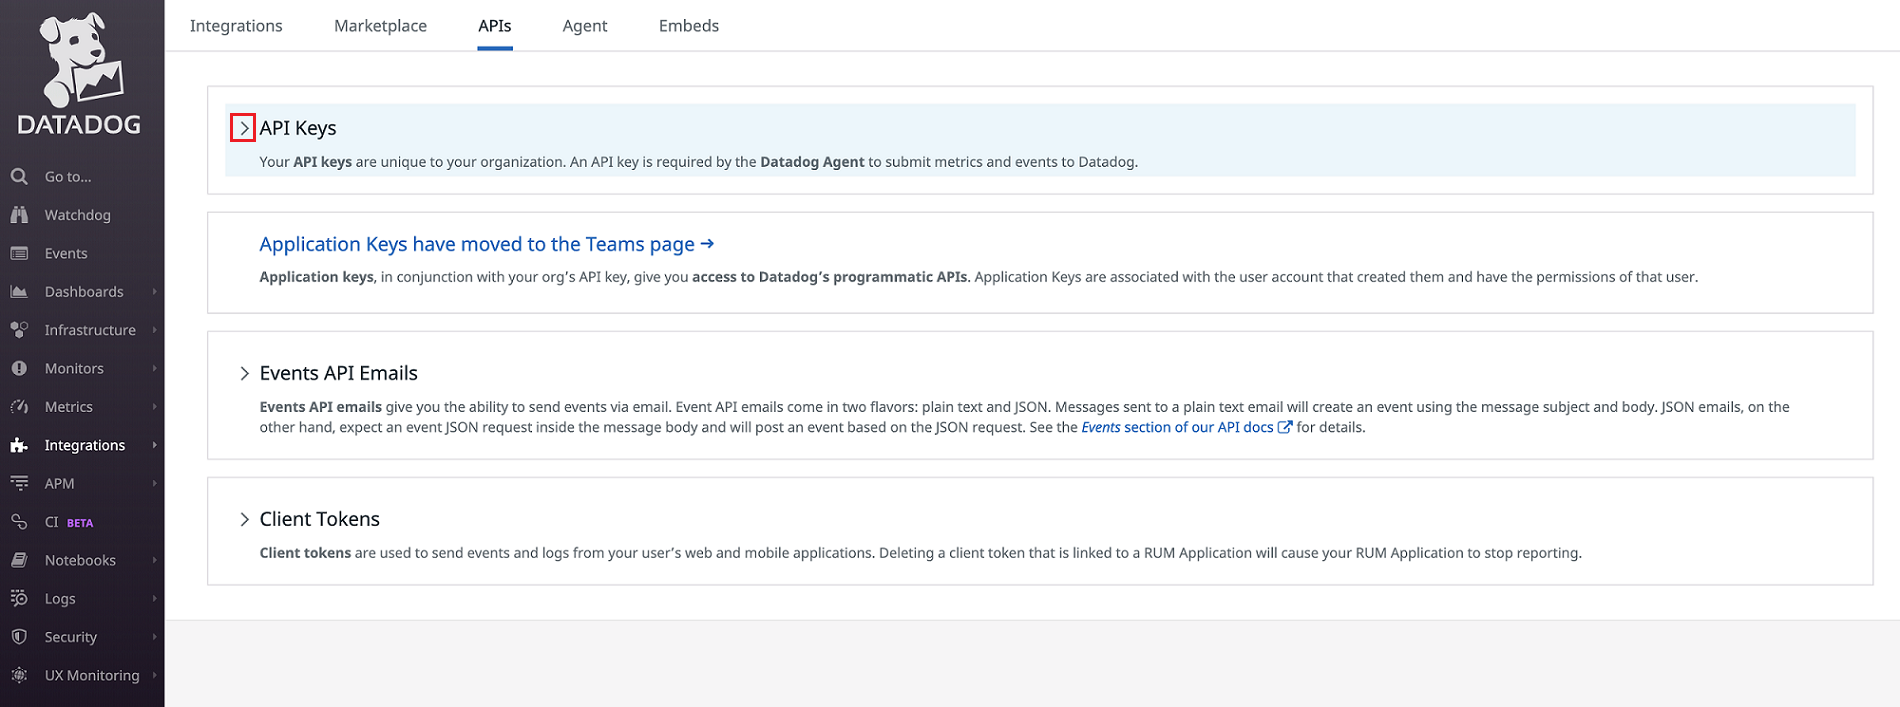
Click API Keys section to expand the section.
-
In the New API key sub-section, enter the API key name and click Create API Key.

The API key name and API key are added to the table above the New API key sub-section.
-
Hover the mouse cursor over the API key to reveal it. This API key is required for integrating Conviva alerts with Datadog services.

In Conviva VSI
-
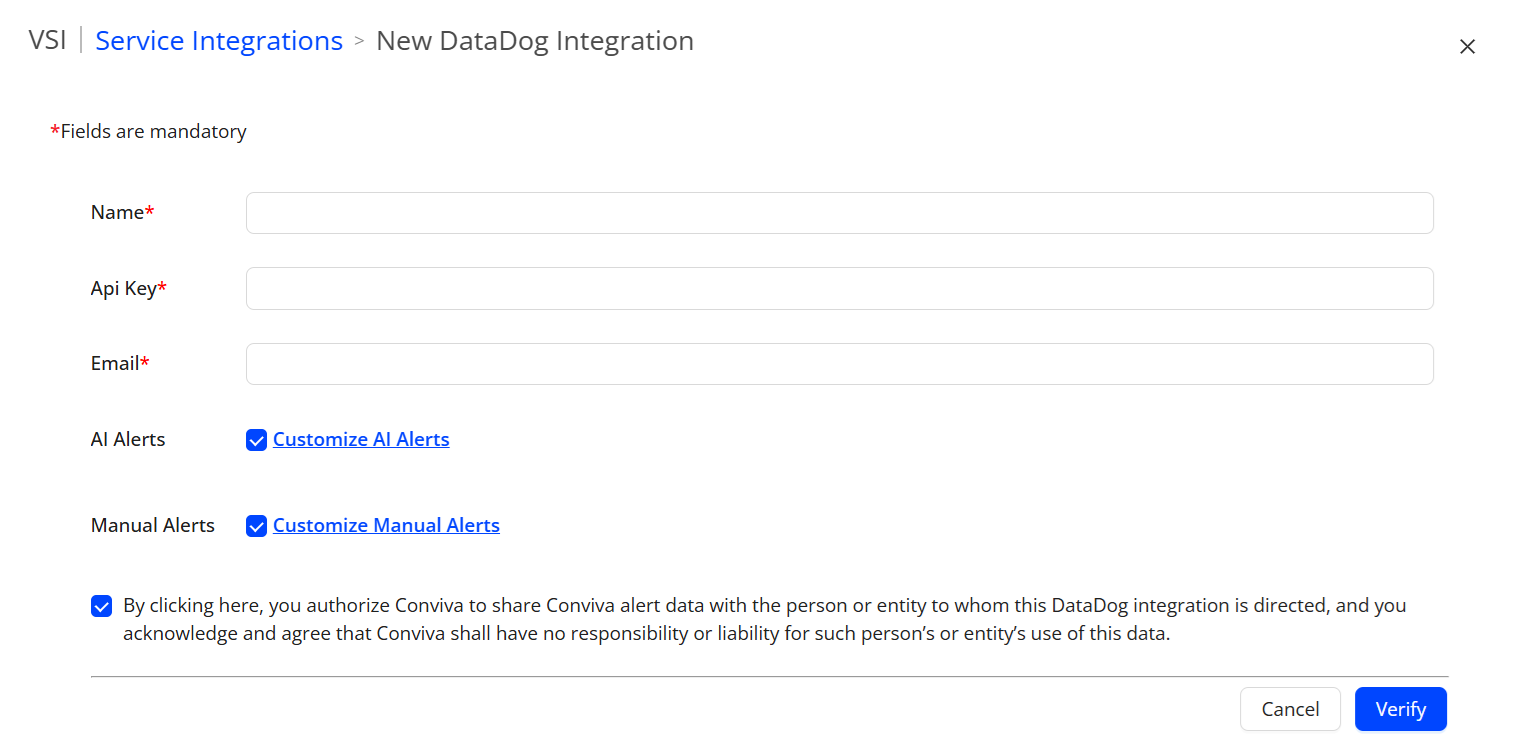
In Conviva VSI, go to Settings > Service Integrations. Click Datadog.
The New DataDog Integration page appears to configure the integration between VSI alerts and Datadog services.
-
Enter the details for the service fields, including the Datadog service name and API key.
-
To select AI alerts, check the AI Alerts checkbox. To customize the alerts, click Customize AI alerts. The AI Alerts Settings pop-up box appears.
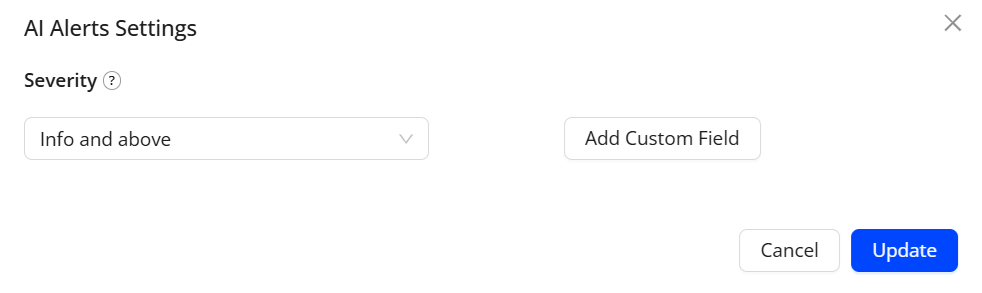
Use the Severity drop-down menu to select an alert severity (Info and above, Warning and above, Critical only) that can help determine the impact of the alert condition.
Also, use the Add Custom Field button to add optional custom key and value fields as key/value pairs.
For more information about AI alerts, see AI Alerts.
-
To select manual alerts, check the Manual Alerts checkbox. To customize the alerts, click Customize Manual alerts. The Manual Alerts Settings pop-up box appears.

Use the Priority drop-down menu to select an alert priority (P3 and above, P2 and above, P1 only).
Also, use the Add Custom Field button to add optional custom key and value fields as key/value pairs.
For more information about manual alerts, see Manual Alerts.
-
To verify the integration, click Verify. Conviva sends a test notification to Datadog.
-
To verify receipt of the test notification, log in to Datadog and click Events.
-
To acknowledge receipt of the test notification, on the New DataDog Integration page in VSI, click Confirm.
-
To save the configuration, click Save. Future alerts will appear in Datadog's Events page.

Note: In addition to alerts integration, based on requirement integration metrics with Datadog. For more information, see Datadog Docs.
Datadog Datadog Datadog