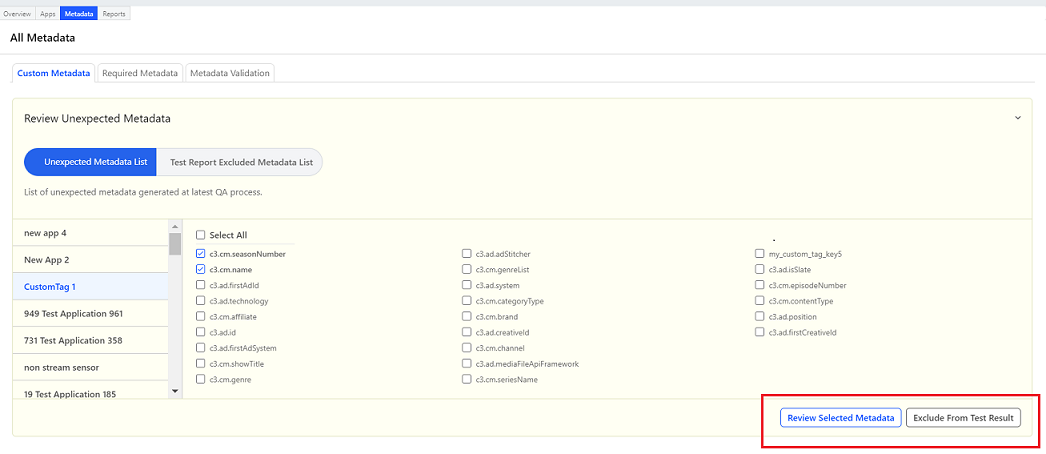
The Metadata dashboard in App Manager enables you to define the metadata strategy, review the unexpected metadata, and add custom metadata to your device applications. See the tag, Content or Ad, adjacent to the unexpected metadata keys to identify their types.
You can review and configure the unexpected metadata that wasn't configured in the metadata engine during the app setup. If your apps do not have any unexpected metadata, then the Review Unexpected Metadata section doesn't appear.
Metadata Strategy
The Metadata dashboard lists the following metadata:
Required (Pre-defined) Metadata - Conviva defined metadata.
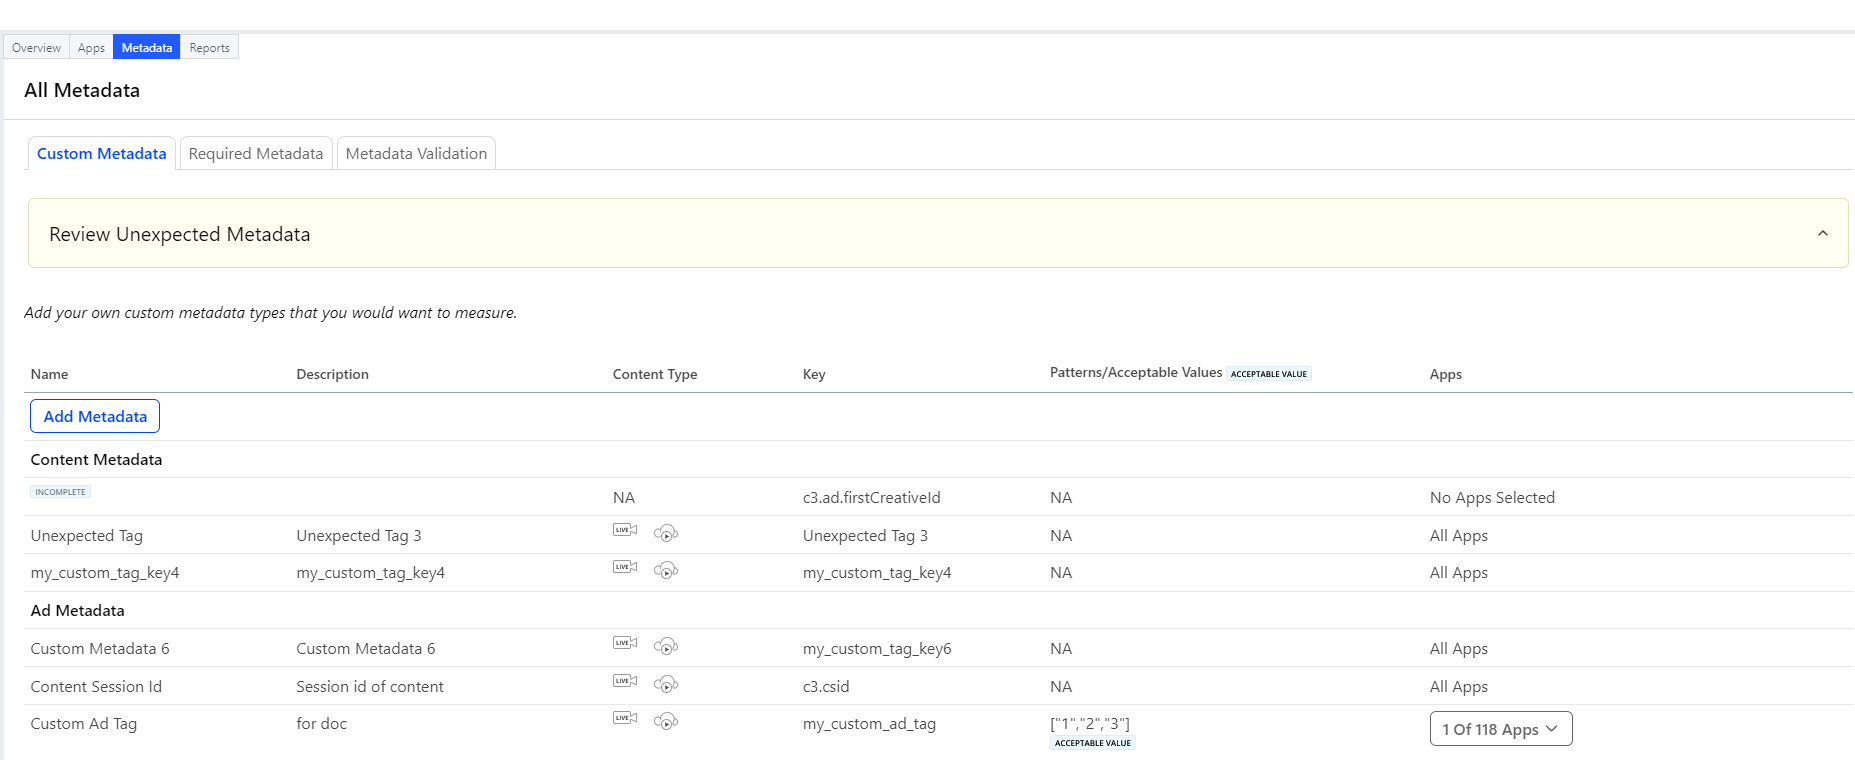
Custom Metadata - Metadata that extend your implementation using custom tag keys that are specific to your business requirement for either video or advertisement content.
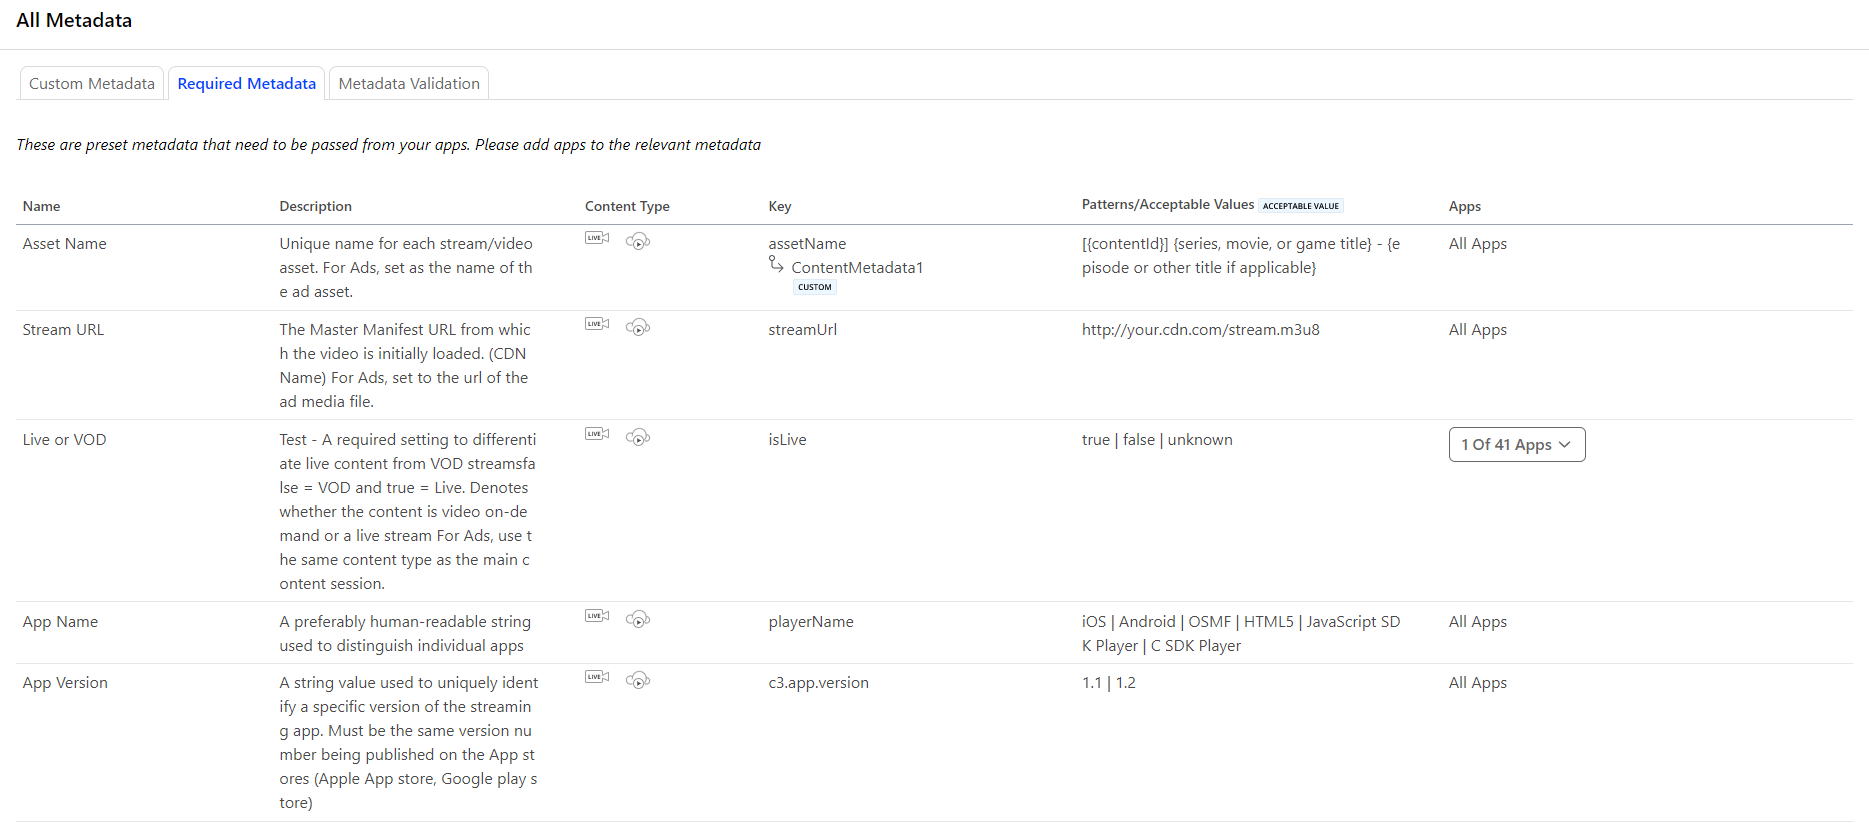
Required Metadata
This section lists the required metadata for your device applications. Each row contains the required metadata's name, description, content type, tag key, pattern or acceptable values, and the list of applicable device applications. For more details, refer to Required Metadata Constants.
You can edit a required metadata to apply it for some or all device applications. You can also map a required metadata to another required or custom metadata.
 Applying Required Metadata
To apply a required metadata to some or all device applications:
Navigate to the Metadata tab.
The Metadata dashboard appears.
Click Required Metadata tab.
Click the
 icon of a required metadata that needs to be applied.
The required metadata's row is now editable.
To apply the required metadata to some device applications, select the applicable device applications from the Apps drop-down menu.
To apply the required metadata to all device applications, select Select All from the Apps drop-down menu.
Click Save Metadata.
Note: To disable a required metadata, check the Not Applicable check-box of the required metadata that needs to be disabled.
Custom Metadata
This section lists the custom metadata, such as ISAN, Rating, Streaming Protocol, and Viewer's Age, which you have created for your device applications. Each row contains a custom metadata's name, description, content type, tag key, pattern or acceptable values, and the list of applicable device applications.
When you are viewing a custom metadata, the names of the applicable device applications for that custom metadata are displayed in the Apps column.
 Creating Custom Metadata
You can create custom metadata using the Metadata dashboard.
To create a custom tag:
In the navigation menu, click Metadata.
The Metadata dashboard appears.
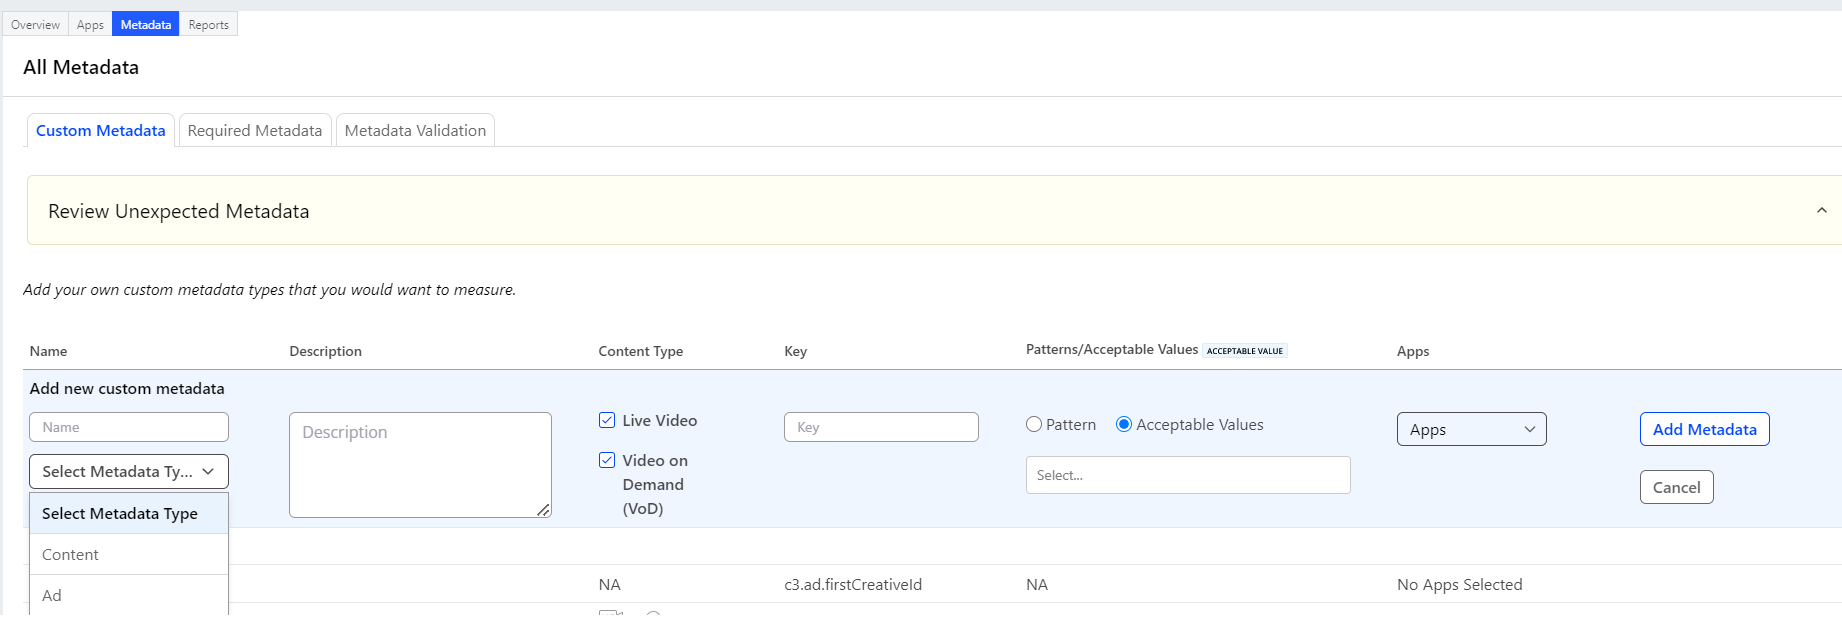
In the Custom Metadata tab, click Add Metadata button.
A new section for entering custom metadata appears.
Provide the custom metadata's information. The Name, Metadata Type, Description, and Key fields are mandatory.
Note: Ensure that the custom tag names do not start with
c3.cm.xxxxxx. This naming convention is reserved for the required content metadata. For example, avoid naming the custom tags asc3.cm.MyCustomTag.
For the Select Metadata Type field, if the custom metadata needs to be added for ad sessions, then select the value as Ad. For video sessions select the value as Content. If you need to select both, then create two separate custom metadata.Click Add Metadata.
 Mapping Custom Metadata to Required Metadata
To map a required metadata:
Navigate to the Metadata tab.
The Metadata dashboard appears.
Click the Required Metadata tab.
Click the
 icon of a required metadata that needs to be applied.
The required metadata's row is now editable.
Toggle the Map to Metadata option, and choose the type of the metadata: Required or Custom.
Select the type of the source metadata, and select the source metadata from the drop-down menu that appears.
Click Save Metadata.
When a required metadata is mapped:
The device metadata that are applicable for the source metadata are automatically copied to the target metadata.
The mapping information is provided in the Metadata dashboard.
Note: After a metadata is mapped, you cannot directly edit the target metadata . You need to edit the source metadata and the new information is reflected in the target metadata.
If the source metadata fails validation, then the target metadata also fails the validation.
 Validating Metadata
Validate the metadata of a device application in your c3.account with the version in Touchstone.
To validate metadata:
Navigate to the Metadata tab.
The Metadata dashboard appears.
Click Metadata Validation tab.
From the App Name drop-down menu, select the device application.
In the Touchstone URL text field, enter the Touchstone URL.
To get the Touchstone URL:
Log in to Touchstone.
Create a session from your device application by triggering events; that session is now available on Touchstone.
Copy the Touchstone session URL from the browser where Touchstone is opened. Paste this URL in the App Manager--> Touchstone URL field.
Sample Touchstone URL: https://touchstone.conviva.com/ui?client=2869412.6208598.890294.12345678&session=1002531518&pub=0&before=1678700618.1981997
Note: Touchstone session URL is available only for Test accounts (debug mode), and not for production accounts.
Click Start Metadata Validation.
The validation results are displayed. Click Export Report button to export the validation results.


