Conviva VSI enables the integration of manual and AI alerts with PagerDuty, enhancing advanced video alerts with PagerDuty escalation management and notifications. Integrating Conviva alerts with PagerDuty services, requires a PagerDuty account with configured services.
Note: Alert notifications may experience a delay of 6 to 10 minutes after issue occurrence.
-
Log in to PagerDuty through the Service Integrations page. From the Services menu, select Service Directory. The service directory page appears with the current services.
- To create a new service for Conviva integration, click +New Service.

-
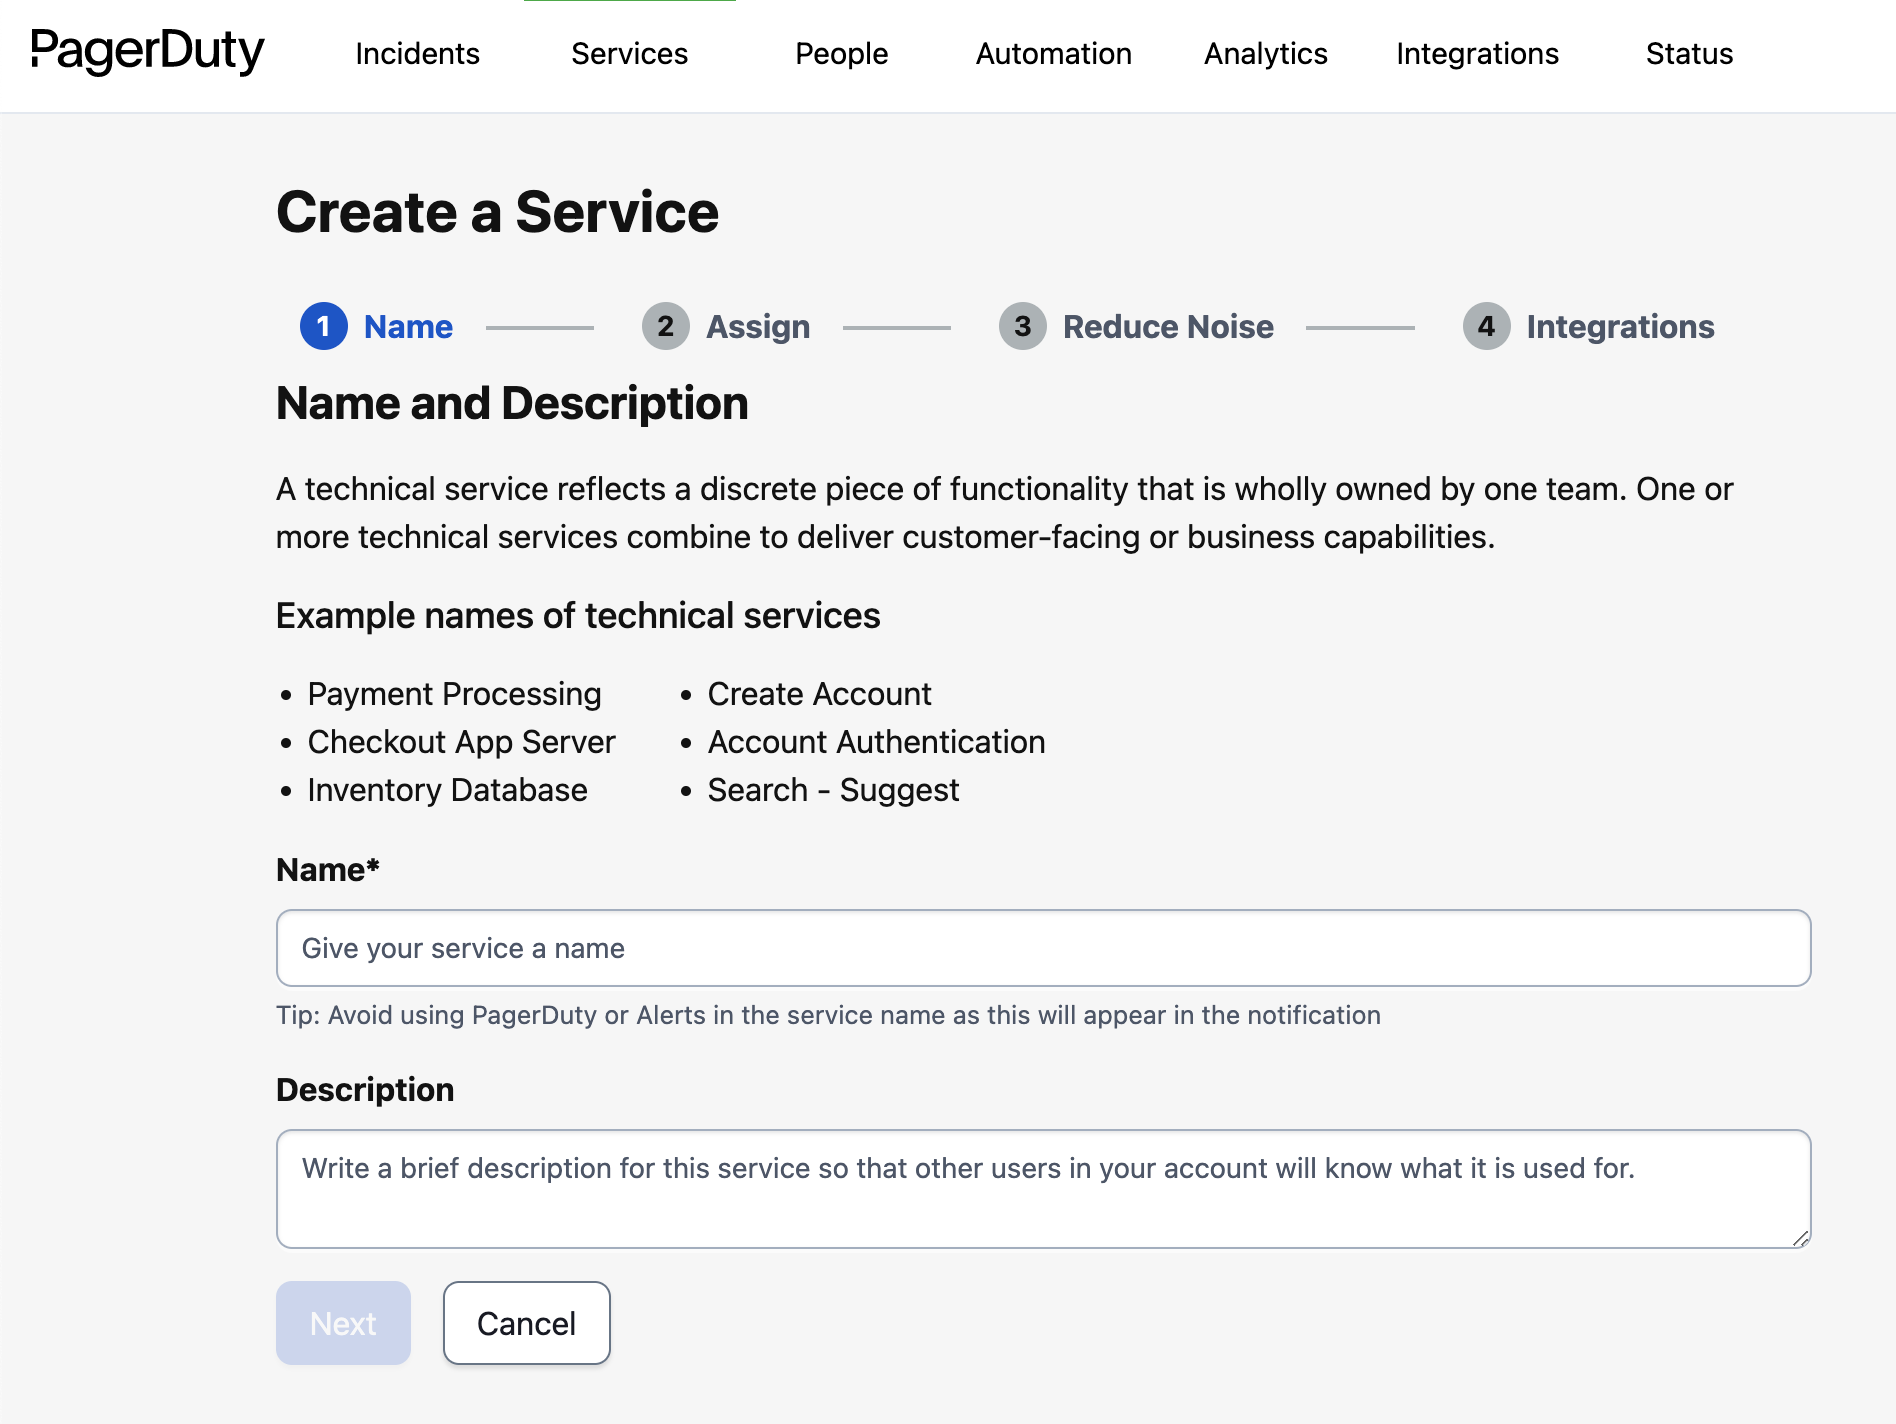
On the Create a Service page, specify the details in all four steps.
The created service is displayed in the list of services.
-
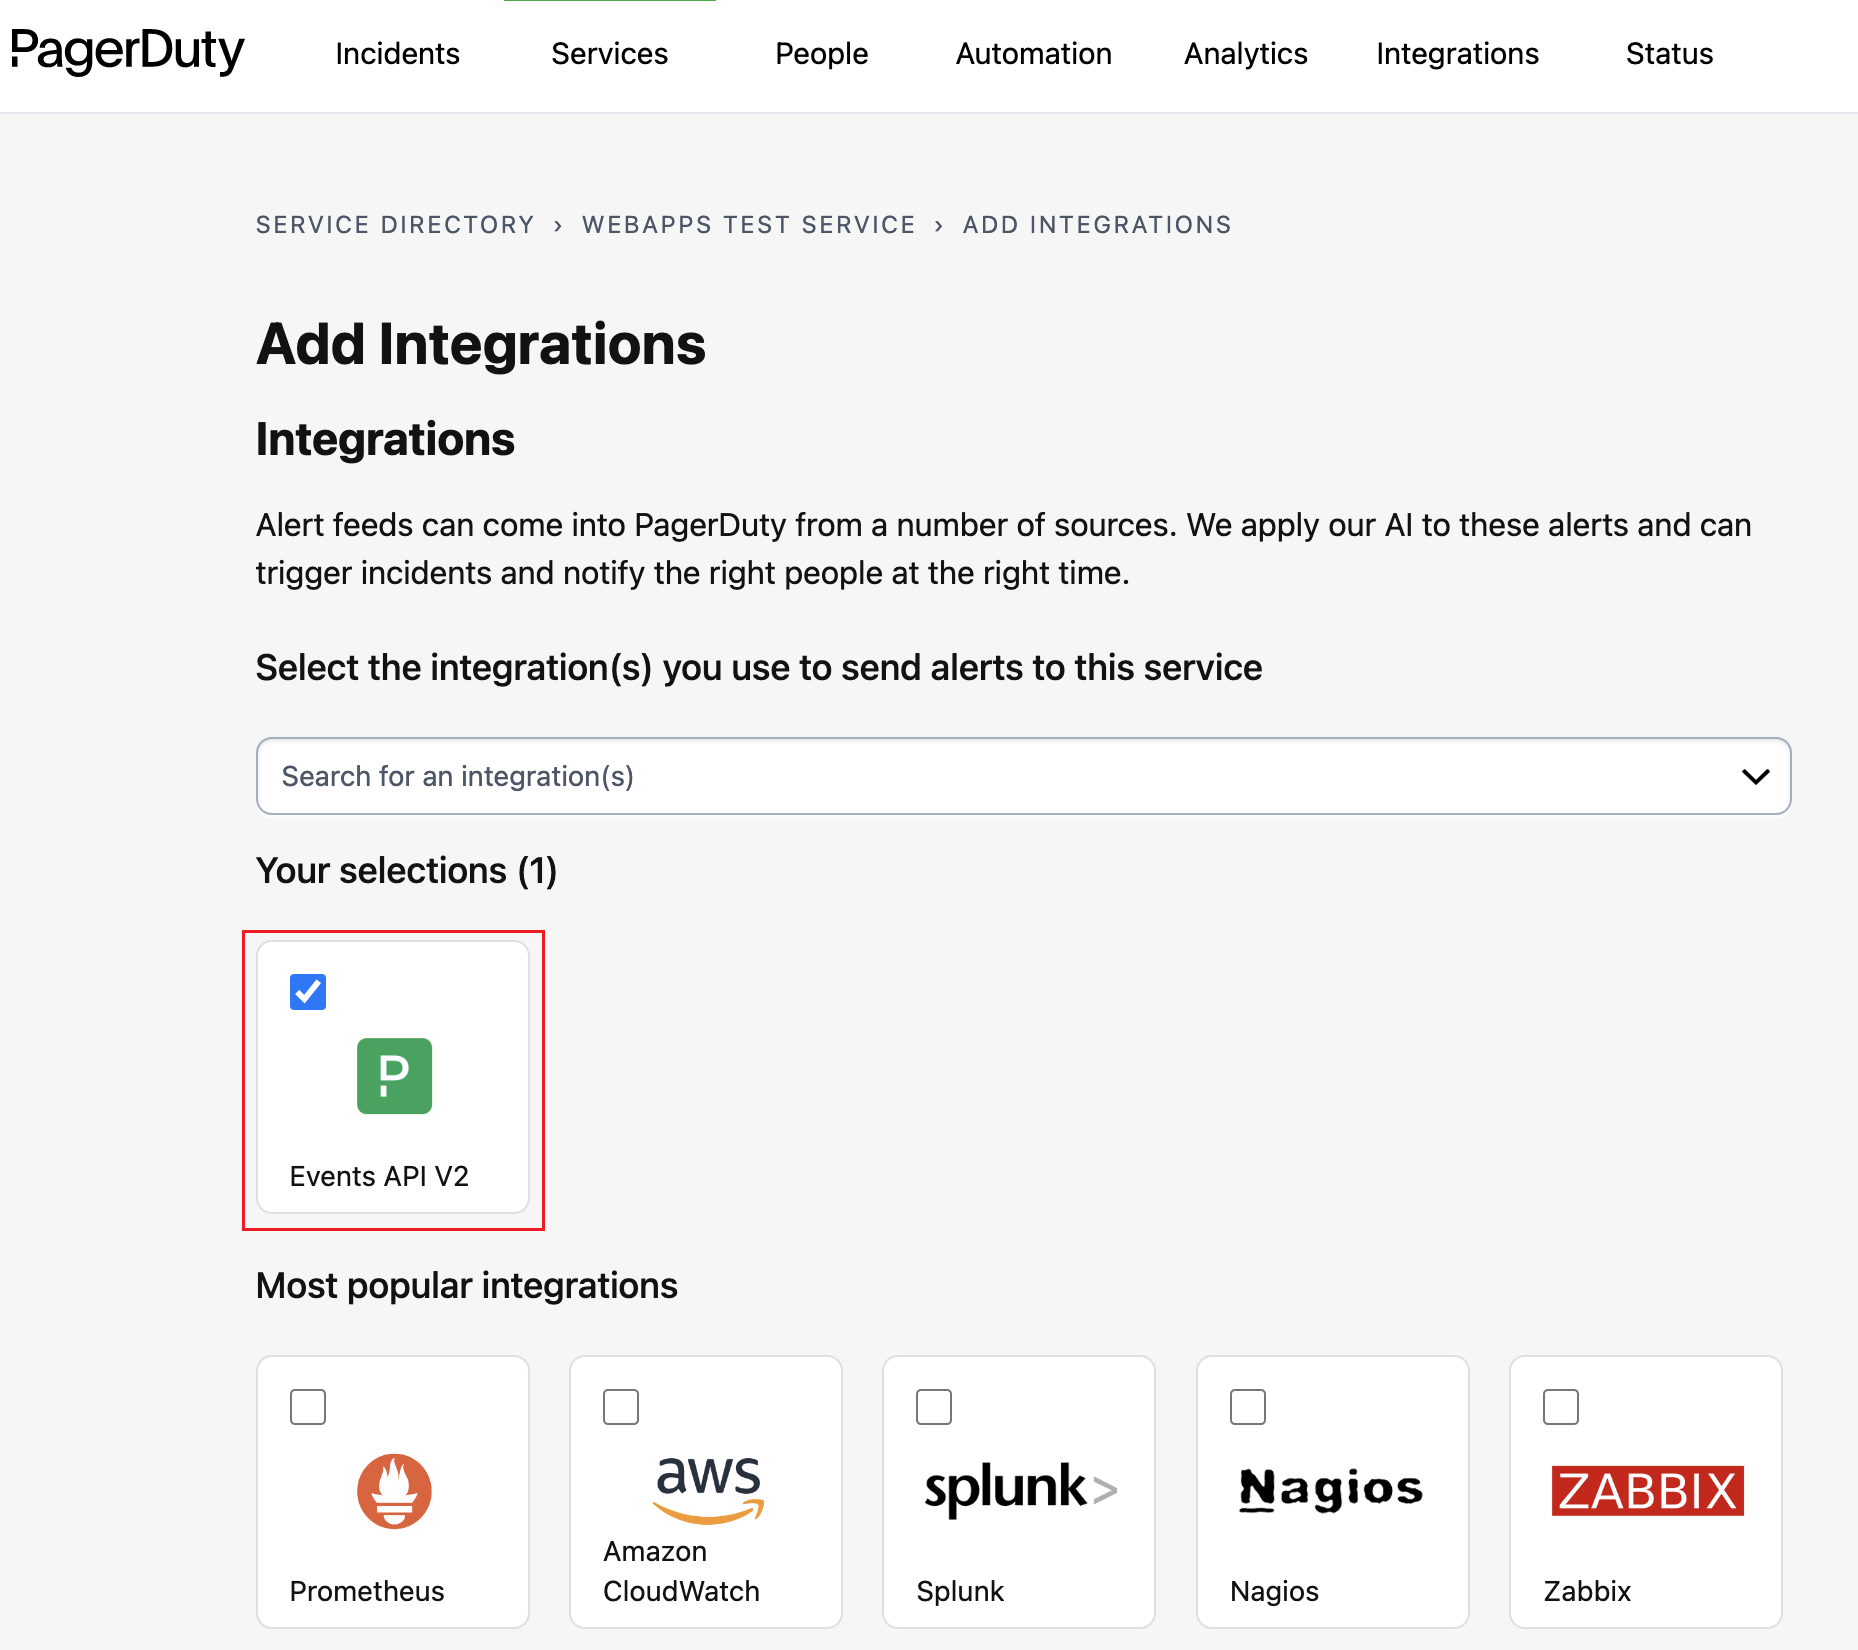
To add integrations with a service, click the Integration tab on the services page and view the current service integrations. Click add an Integration to see the Add Integrations page.

-
On the Add Integrations screen, select Events API V2 from the displayed list of integrations and click Add.
-
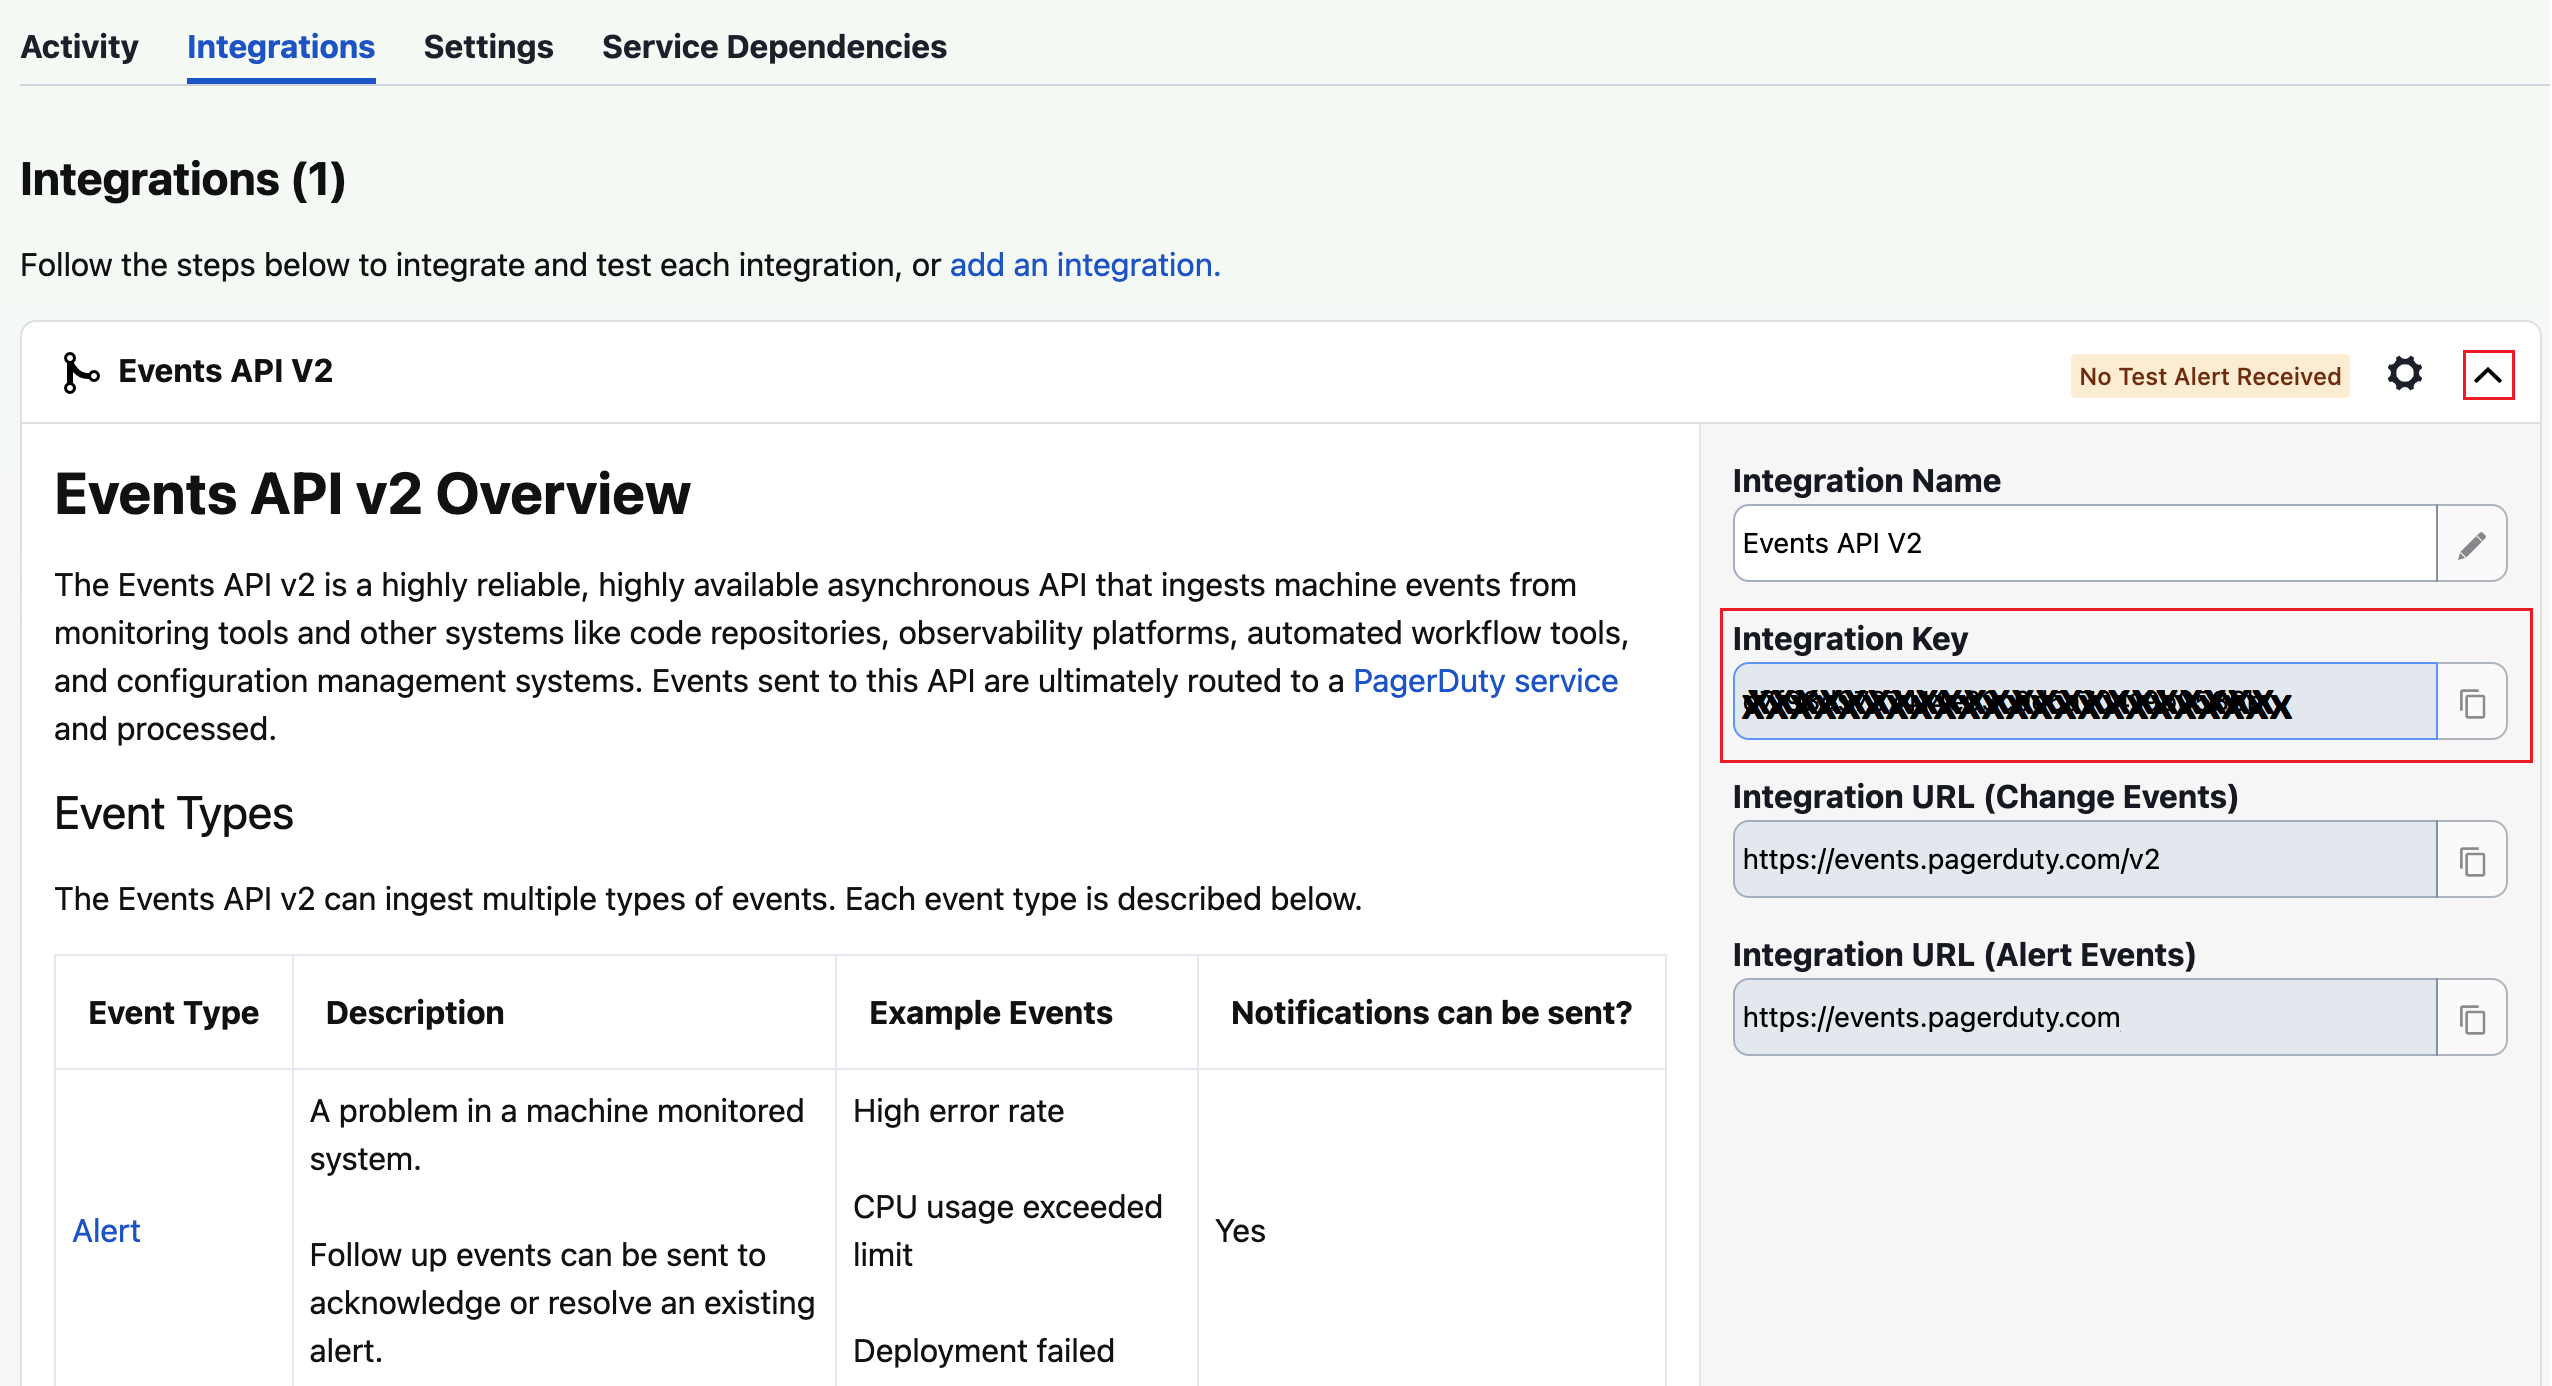
On the Services page, click the drop-down button to see the integrations for the service. The Integrations tab displays the integration key required for the Conviva configuration.
In Conviva VSI
-
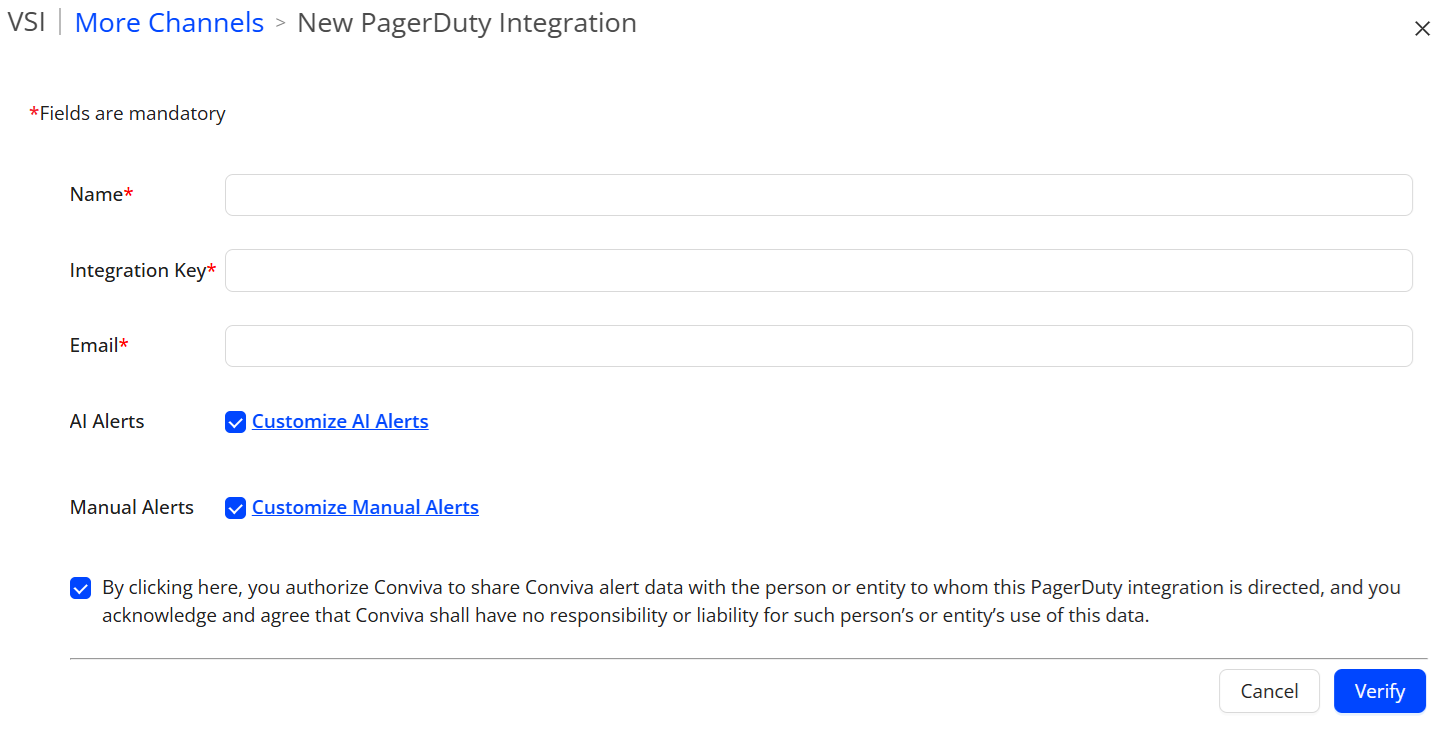
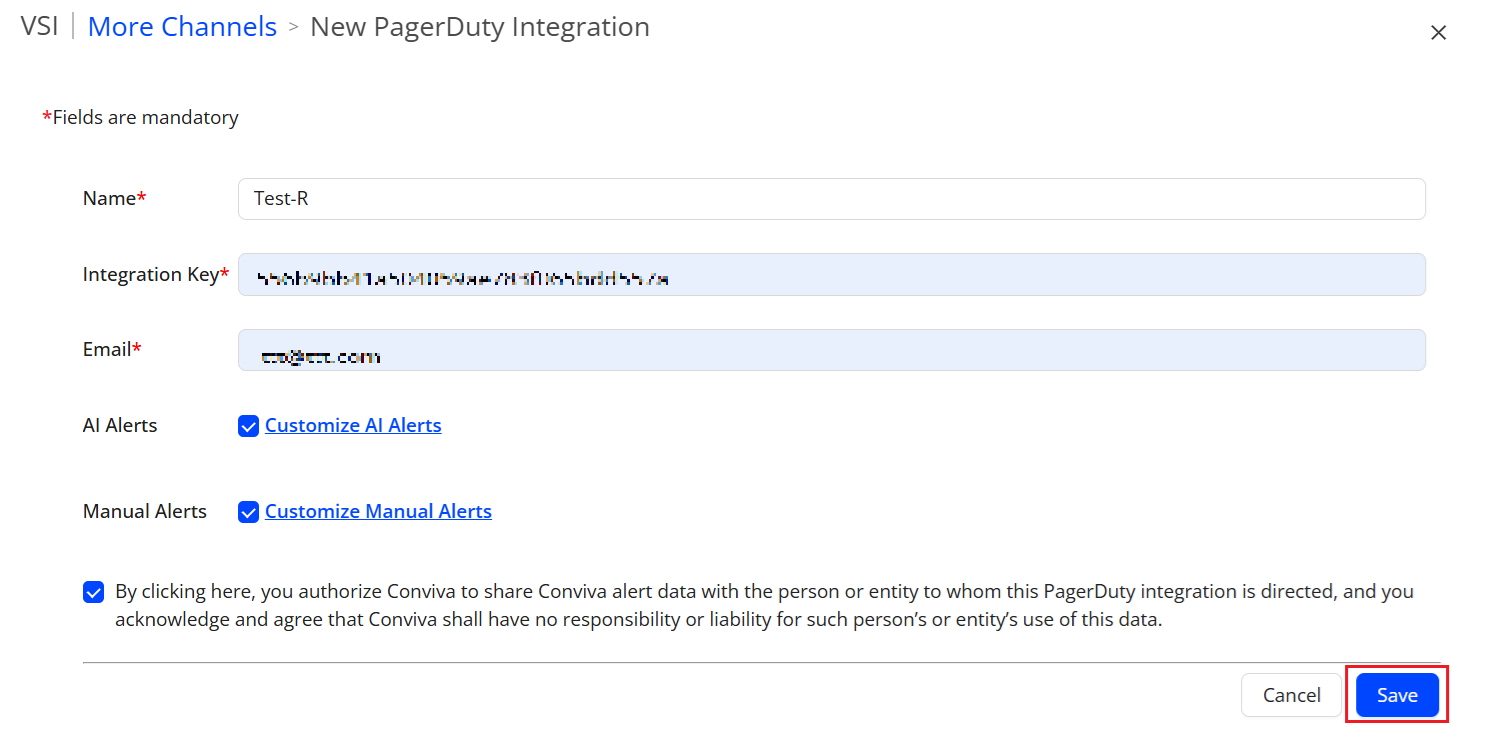
In Conviva VSI, select the Settings > More Channels menu and click the PagerDuty to add the PagerDuty services in New PagerDuty Integration page.

The New PagerDuty Integration page displays options to configure the integration between VSI alerts and PagerDuty services.
-
Enter the service fields, including the PagerDuty Service Name and Integration Key and the desired alerts and Click Verify. For more details, see PagerDuty Configuration in Conviva VSI.
-
To select AI alerts, check the AI Alerts checkbox. To customize the alerts, click Customize AI Alerts. The AI Alerts Settings pop-up appears.
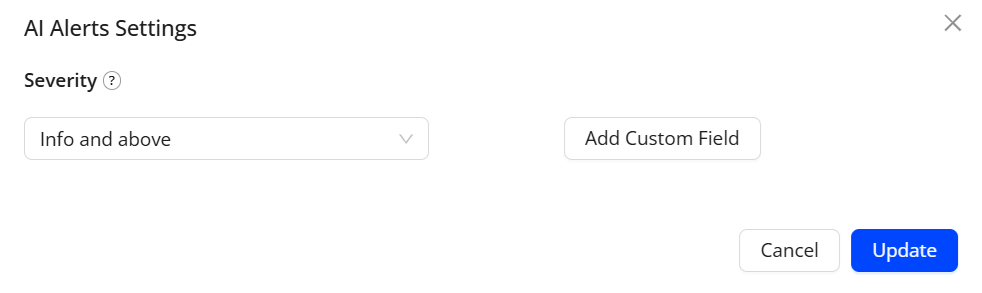
Use the Severity drop-down menu to select an alert severity (Info and above, Warning and above, Critical only) that can help determine the impact of the alert condition.
Also, use the Add Custom Field button to add optional custom key and value fields as key/value pairs.
For more information about AI alerts, see AI Alerts.
-
To customize manual alerts, check the Manual Alerts checkbox. To customize the alerts, click Customize Manual alerts. The Manual Alerts Settings pop-up appears.

Use the Priority drop-down menu to select an alert priority (P3 and above, P2 and above, P1 only).
Also, use the Add Custom Field button to add optional custom key and value fields as key/value pairs.
For more information about manual alerts, see Manual Alerts.
-
Click Confirm on the Confirm PagerDuty Configuration screen.

-
Click Save on the PagerDuty screen to save the PagerDuty configuration.
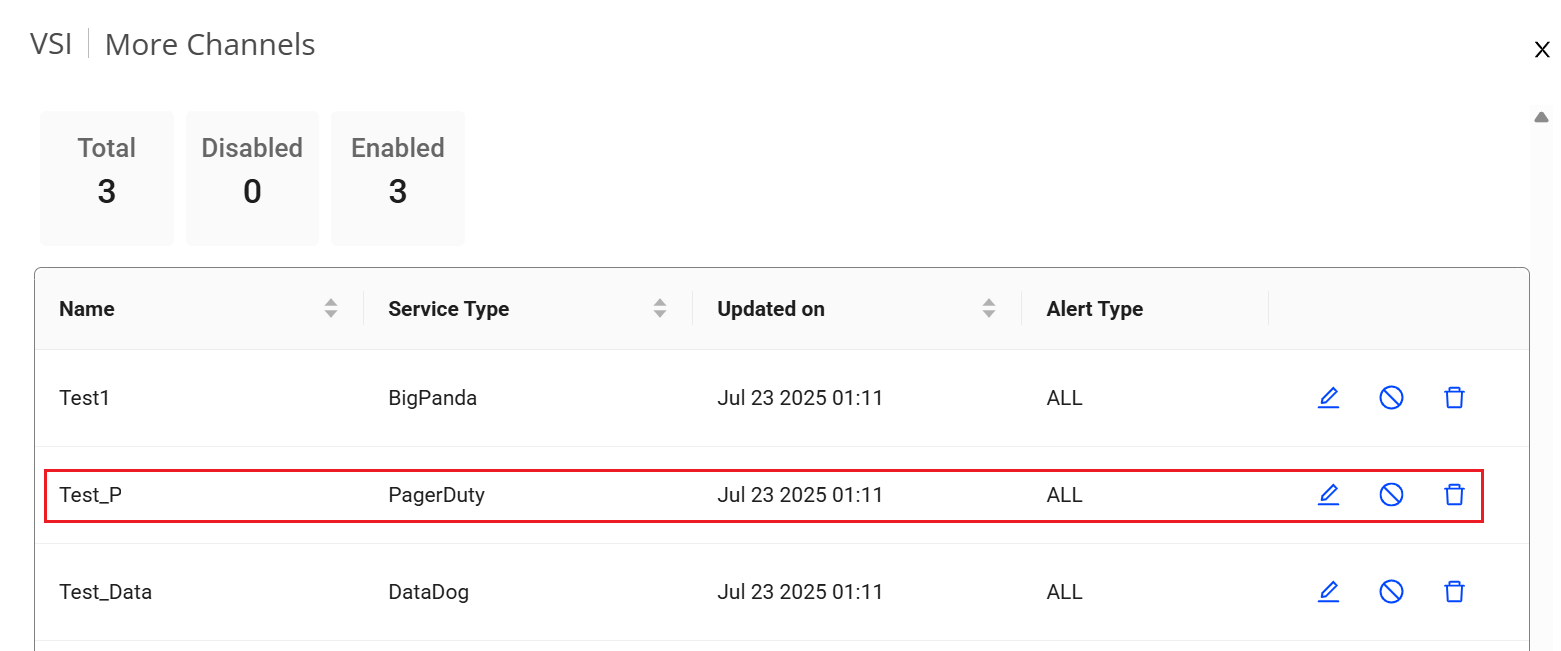
The saved pager duty is listed in the More Channels list.
PagerDuty Integration Notification PagerDuty Notification Integration Notification Channels PagerDuty Integration Notification Pager Duty Notification Channels Pager Duty Notification Channels