The LiveLens enables you to find accurate event names and tags while using your application in real-time, helping you prepare for event mapping and metrics building.
For example, raw events occurring during a web application login, such as authentication API calls, login button clicks, or success tokens, can be identified as critical login process milestones. Using the Semantic Mapper, these raw events can then be mapped to create metrics monitoring the login process duration.
Note: The User dashboard provides a historical record of mapped events to track past user behaviors and event sequences.
Exploring Events in Real Time
With the LiveLens, efficiently explore application events that occurred to monitor the event flows (initial and follow up events) that can be used to create the most meaningful and actionable metrics.
Note: After opening the LiveLens, data from the past 5 minutes displays and new data continues to be appended from the time you open the LiveLens.
-
From the DPI menu, click Activation, then click the LiveLens tab on the Activation page to access the LiveLens page.
-
Locate the device running the application in which events will be monitored.
Note: By default, the Find Myself By IP Address option and the current IP address are automatically selected.
You can select one of the options based on your requirements:
-
Find Myself By IP Address: If the DPI application and the device running the application are on the same network, the current IP address is automatically fetched by LiveLens. If not, enter the IP address that the device is using. You can use the search engine on the device to find the IP address.
-
Find Myself By User ID: Use the user account ID to locate the device.
-
Find Myself By Client ID: Use the client ID to locate the device.

-
-
Locate the active user from the pop-up table and click the client ID to open the Real-time Timeline area for that user. Use the search function to find the required user through user ID matching.

-
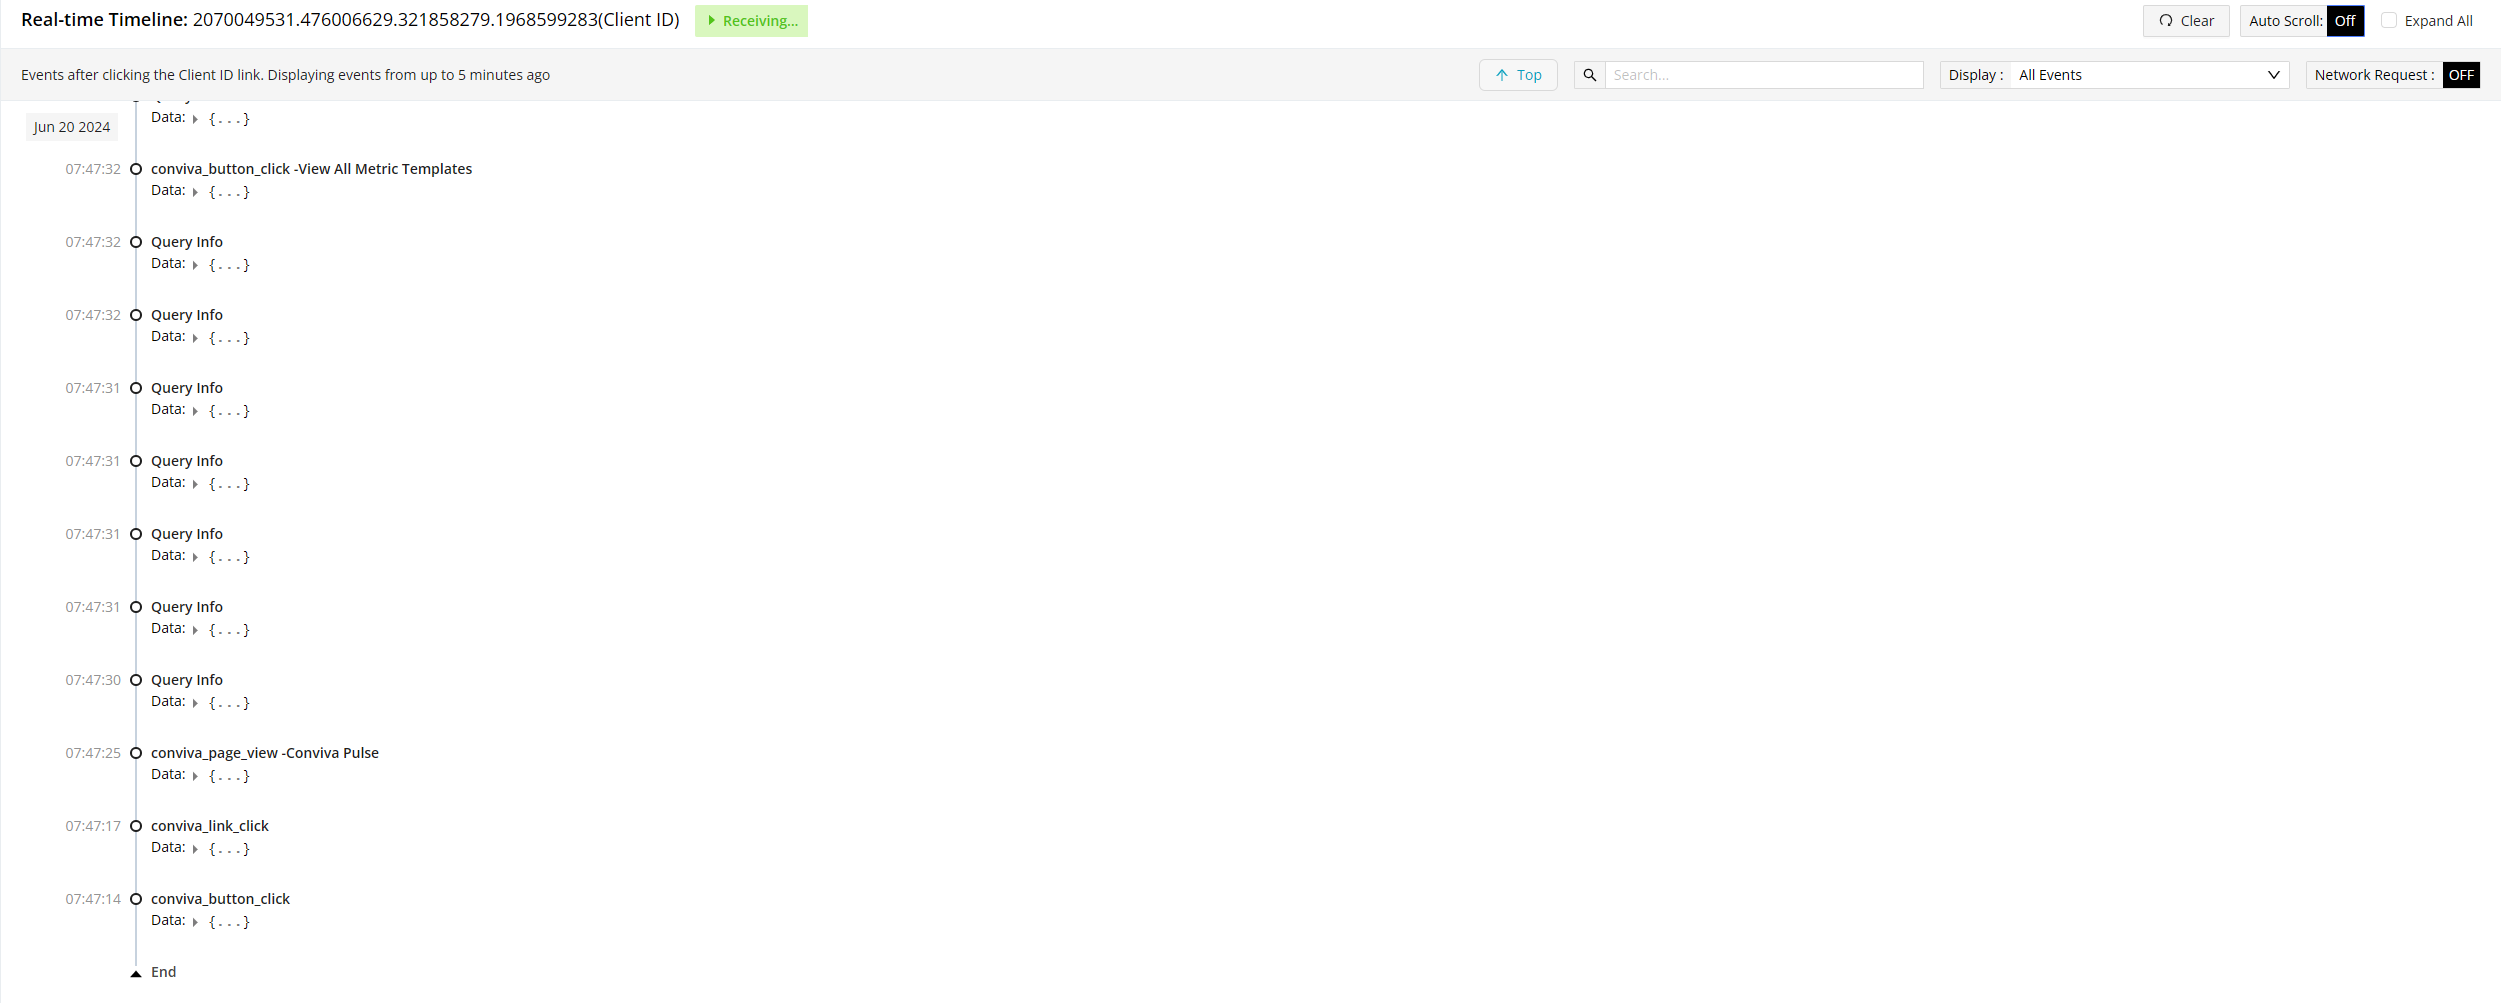
Explore the events in the Real-time Timeline area.
For example, all the raw events related to the user activities that occurred within 5 minutes after clicking the login button.

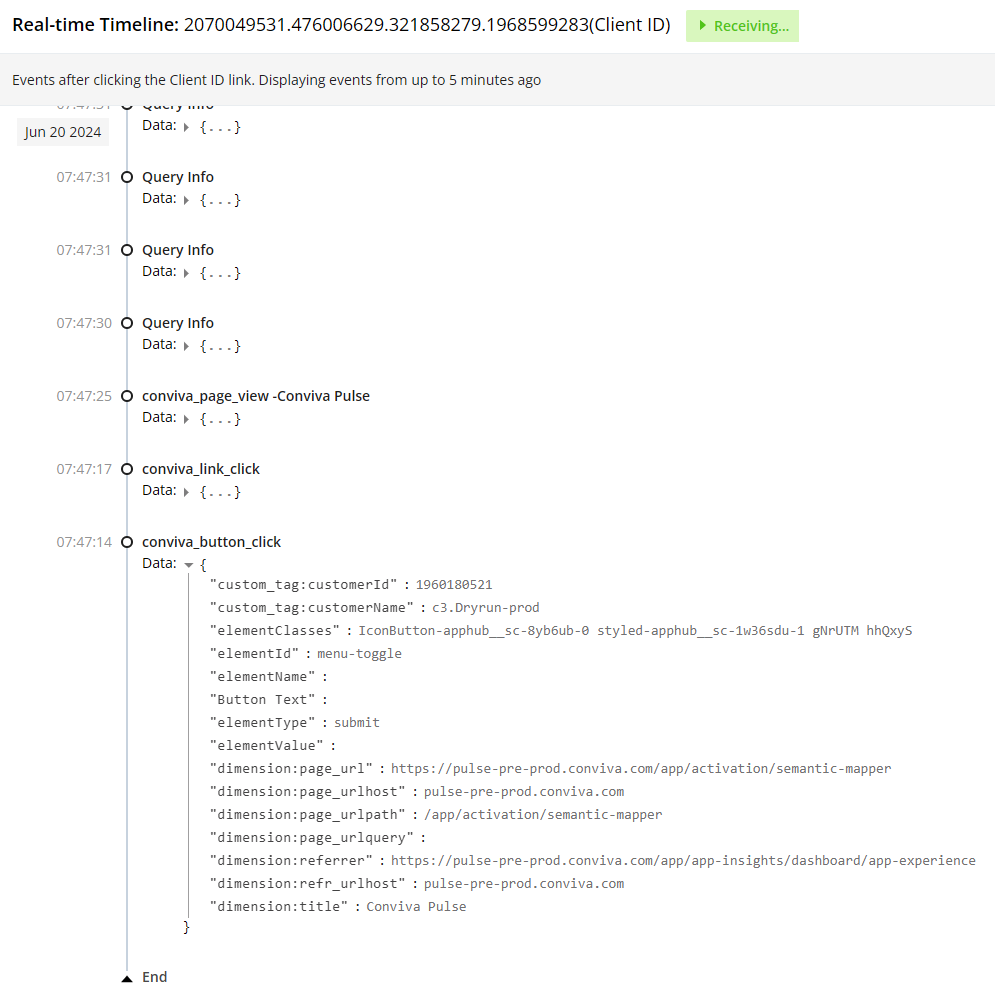
Click the Data Expander to display the data details. The details are useful for mapping events. For example, use the conviva_button_click data to determine elememtID: menu-toggle, and elementType:submit. Map the conviva_button_click raw event, by using elementID or elementType as a tag key and menu-toggle or submit as the corresponding tag value.

When using Semantic Mapper to map events displayed in LiveLens, keep in mind that some event tag keys names may have slight variations as shown below.
Predefined Tag Key Name in LiveLens
Tag Key Name in Semantic Mapper
Button Click Element Text buttonClickText Button Text conviva_button_click / elementText Duration requestDuration / duration Screen Title pageTitleAndScreen / conviva_screen_view Page Url pageUrl Page Title pageTitle / conviva_page_view / page_title Link Click Element Target linkClickTarget Link Target conviva_link_click Target Url requestTargetUrl / targetUrl Previous Screen Title previousScreen Network Request Response Code requestResponseCode / responseStatusCode Additional functions for efficient event exploration include:
-
Clear button: Clears all displayed raw events and starts showing new events that occur after clicking the Clear button.
-
Auto Scroll: Enables automatic scrolling of the data for raw events, so the displayed events refresh without user intervention.
-
Expand all: Selects the check box to display all data for raw events.
-
Search box: Allows input of keywords to quickly locate matching raw events.
-
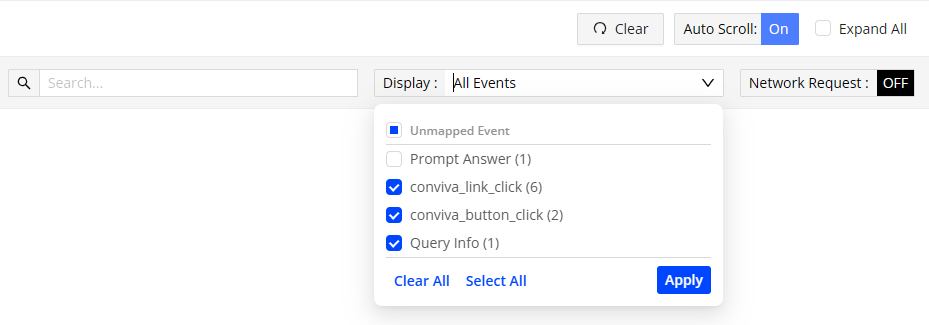
Display: The drop-down list shows all raw events grouped by raw event names, with options to clear and select specific events.
-
Network Request: Enables or disables the display of events related to network requests. By default, this option is disabled.

-